Wii U
46 archivos
-
NUSspli
NUSspli es una aplicación que nos permite instalar contenido directamente desde los servidores de actualización de Nintendo a nuestra WiiU.
Características:
Descargar juegos desde los servidores de Nintendo (NUS). Instalar juiegos descargados tanto en el almacenamiento interno de la consola como en una memoria externa. Buscar tickets en NUS y "esa web de juegos". Crear tickets fake a voluntad o si no los encuentra. Mostrar la velocidad de descarga. Teclado en pantalla. Es capaz de descargar cualquier cosa disponible en NUS. Soporte completo para el menú HOME. Nombres de carpeta personalizados para los juegos descargados.
Cómo usar NUSspli
Para descargar un juego, realiza la búsqueda en "Title Database" por el ID de un juego (por ejemplo: base de datos WiiUBrew) Para crear un ticket fake necesitarás el Title ID y la clave de encriptación (disponible en "ese sitio de claves de juegos"). Para instalar la aplicación, descárgala desde esta misma página, descomprime el archivo y, dependiendo de donde vayas a ejecutar la aplicación, sigue los siguientes pasos:
Homebrew Launcher
Mueve la carpeta a SD:/wiiu/apps/ Ejecuta la aplicación desde el HBL a través de Haxchi, Browserhax o cualquier otro exploit compatible. Home Menu
Instala un Custom Firmware. Mueve la carpeta a SD:/install e instalalá con WUPInstaller. Ejecútala desde el menú HOME. Info
NUSspli está basada en WUPDownloader de Poke303.
La aplicación ha sido creada por V10lator.
-
Pimp my Wii
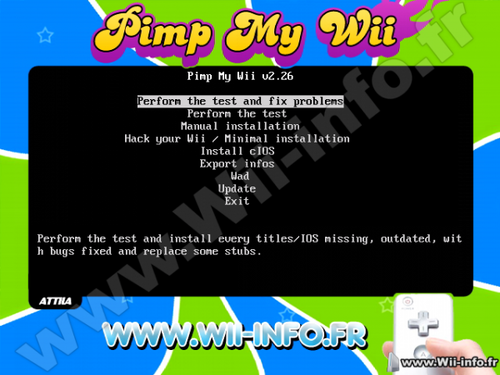
Here is "Pimp My Wii", an homebrew that will Hack your Wii, install missing or outdated IOS / titles, install the cIOS and mIOS necessary.
The program will detect missing or outdated IOS and check that you have the latest version of the Wii System Menu. It also checks if you have the latest versions of BC, MIOS and those channels : Wii Shop, News, Weather, Mii, Photo and Photo 1.1
If you don't have the latest versions of those titles, the program will download them, or read them from USB or SD to install them. When using this program, you will have all advantages from 4.1 cumulated from those of 3.2, and this without drawbacks !
It also install cIOS d2x (based on Waninkoko) (249, 250) v10 and 10 alt and cIOS from Hermes 202/222/223/224 rev5.1. You can if you want install the cIOS from
Waninkoko rev20/21 or d2x v6, 7, 8 or 9beta (you'll have to install it manually from the menu "Install cIOS").
Pimp install the cMIOS from WiiGator.
Pimp will avert you if some homebrews aren't updated. Pimp check the version of the following homebrew (the dirnames must match, and are not case sensible) :
-> Neogamma, in version R9 beta 50 minimum. Dirname : neogamma -> Usb Loader gx, in version 2.2 minimum. Dirname : usbloader_gx -> Uloader, in version 5.1 minimum. Dirname : uloader -> Wiiflow, in version 2.2 (or r302) minimum. Dirname : wiiflow -> Configurable usb loader, in version 70 minimum. Dirname : usbloader or usbloader_cfg Pimp does not update those homebrews itself. No verification will be made on channels, only on the files installed on the SD card in the directory /apps/.
The homebrew is displayed automatically in english, french, italian, german or spanish depending of your Wii's language. It is also compatible with NTSC-U, NTSC-J and PAL Wii consoles. (Korean Wii theoricaly compatible).
Warning: I do not take any responsibility for any damage in your wii because of a improper usage of this software.
Menu:
- Pass the test and fix problems
Check if everything is alright on the Wii, and install what need to be installed, after asking user.
- Pass the test
Only check if everything is alright on the Wii, without installing anything.
- Manual installation
Will propose to install every IOS and titles possible.. By default, the installation will be on "no".
- Hack te Wii/Minimal installation
Pass the test and only install the minimal requirement to hack your Wii. It patch IOS 36.
Also install the cIOSes 249, 250, 202, 222, 223, 224 from d2x and Hermes and the cMIOS.
- Install cIOS
Install a cIOS of your choice between cIOS from Hermes, Waninkoko and Waninkoko d2x. You can choose the IOS source of your choice, the destination slot and the revision.
For Waninkoko's/d2x cIOS, you can choose this IOS source: IOS36 v3607 IOS37 v5662 IOS38 v4123 IOS53 v5662 IOS55 v5662 IOS56 v5661 IOS57 v5918 IOS58 v6175 IOS60 v6174 IOS61 v5661 IOS70 v6687 IOS80 v6943 (IOS 58 only for revision above 20).
For Hermes cIOS, you have the choice between IOS60 v6174, IOS38 v3867, IOS37 v3869 and IOS57 v5661.
Button "minus", "safe mode". In this mode, the IOS test is disabled, you will be asked instead to choose an IOS to use for the installation. You must know that in this mode, you will not know if your installed IOS have the differents bugs, and then the program will not know if they need to be patched.
Note: Pimp my Wii is compatible with the WiiU Wii emulator, but some options are disabled. Moreover, you absolutely need to place the wad files on your SD/USB device because the IOS for the WiiU can't be downloaded directly.
----------------------------------------------------
--------Correction of encountered problems----------
----------------------------------------------------
Here is a lit of common problems that you could have on your Wii (even on latest version) and the solutions that "Pimp My Wii" will do.
- Black screen at loading of dvd games :
Missing IOS -> Install those IOS (patching them)
- The Wii asks for an upgrade when inserting games :
Old IOS -> Update those IOS (patching them).
- A modified game (trucha signed) can't load on the disc channel with my modchip :
The IOS used by game has the trucha bug corrected -> Install a new IOS and patch the bug inside.
The IOS used by system menu has the trucha bug corrected -> Install a new IOS and patch the bug inside.
- The preloader and other homebrew does not work :
The IOS36 has the ES_Identify patched -> Install a new IOS 36 and patch the bug.
- I got reading problems with my backup launcher :
Old cIOS installed (older than rev20) -> Ask user to update this.
- No SD menu, no latest functionnality :
Old version of Wii (system menu, by example 3.2) -> Upgrade to 4.1 (but patching everything) for more compatibility, functionnality.
- The Wii Shop ask me to update :
Old version of Wii Shop (older than v20) -> Upgrade to this version (and install IOS 56 associated).
- I don't have any IOS that has the trucha bug (if you have a virgin Wii) :
The homebrew put the trucha bug back in IOS15.
- I can't install the Hackmii Install, because I have some kind of cIOSCorp :
You need a unmodified IOS 58 -> Install this IOS.
!!!!!!!!!Leave the parameters by default if you don't know what you do ! A bad choice of "hacks" could leave your system unstable!!!!!!!!!!!!
----------------------------------------------------
-----------------Questions / answers----------------
----------------------------------------------------
- Does it works without internet ? / I got errors during download, what can i do ?
It works without internet, you just need to put necessary wad files to the root of the SD card, or of a USB device in FAT32.
Follow this (french) tutoriel to get those files : http://www.wii-info.fr/article-53-comment-recuperer-un-ios-mios-chaine.htm
The necessary IOS are those, in their specific versions :
9 v1034, 12 v526, 13 v1032, 14 v1032, 15 v1032, 17 v1032, 21 v1039, 22 v1294, 28 v1807, 30 v2576, 31 v3608, 33 v3608, 34 v3608, 35 v3608, 36 v3608, 37 v5663, 38 v4124, 50 v4889, 53 v5663, 55 v5663, 56 v5662, 57 v5919, 58 v6175, 60 v6174, 61 v5661, 70 v6687 and 80 v6944.
And thoses "stub" IOSes, within their specific versions : IOS4v65280, IOS10v768, IOS11v10, IOS16v512, IOS20v12, IOS41v3607, IOS43v3607, IOS45v3607, IOS46v3607, IOS48v4124, IOS51v4633 and IOS254v260.
IOs must be named this way : IOSX-64-vY.wad, where X and Y are respectively the version and revision number.
To update the System Menu, you need the file RVL-WiiSystemmenu-vX.wad, where X is 448 for 4.1J, 449 for 4.1U, 450 for 4.1E and 454 for 4.1K.
For Wii Shop, you need RVL-Shopping-v20.wad
For bc, RVL-bc-v6.wad
For MIOS, RVL-mios-v10.wad
For other channels, XY-NUS-vZ.wad, where X is the "type", Y the number and Z the version. By example for Mii Channel it's 1000248414341-NUS-v6.wad (or RVL-NigaoeNR-v6.wad).
For the cIOS installation:
- cIOS 249 : IOS 56 rev 5661
- cIOS 250 : IOS 57 rev 5918
- cIOS 202 : IOS 60 rev 6174
- cIOS 222 : IOS 38 rev 3867
- cIOS 223 : IOS 37 rev 3869
- cIOS 224 : IOS 57 rev 5661
- I got the preloader, will it work ?
If you are not in 4.1 and if you accept the installation of this system menu, you will need to reinstall the preloader and the specifics hacks to this version. Follow this (french) tutoriel to install and configure preloader : http://www.wii-info.fr/article-52-installer-et-configurer-le-preloader.htm
- I have the preloader and i got "system files are corrupted", what can I do ?
If you have the preloader, you must patch "ES_Identify" on the IOS used by this. For Wii 4.x, it's IOS60, else it's IOS 30. Leave the parameters by default if you don't know what you do.
- I have a custom theme, will it stay ?
If you change your Wii version, you will lose all themes and you will need to reinstall a compatible theme with the version of System Menu you have.
- I have cIOSCorp or equivalent installed (to read backup games from disc channel), what will happened ?
If you install IOSes, it will replace those installed by cIOSCorp and you will loose the ability to launch games via disc channel without modchip. But cIOSCorp isn't recommanded, you just need a loader like Neogamma to read backups. If you reinstall cIOSCorp, you will get your old IOS back then Pimp My Wii will tell you that they are outdated
- Should I upgrade my console to 4.1 ? I thougt I must stay to 3.2 ?
If you use this program to put your console to 4.1, you will have exactly the same advantages as a 3.2 Wii, but you will have the improvements of 4.1. You won't have any disadvantages to put your Wii to 4.1.
- Should I install all IOS asked ?
It is recommanded to install IOS indicated as "not present" and IOS 30, 34, 36 and 60. You should also leave parameters by default. If you install at least those, you will avoid most of problems.
- The other IOS, are they useless ?
For other IOS, patching them help launching Trucha Signed gamed on Wii with a modchip.
- I got a message saying that my Custom IOS is outdated, what can I do ?
Follow this (french) tutoriel to upgrade your cIOS : http://www.wii-info.fr/article-40-installer-ou-desinstaller-un-custom-ios.htm
-
Uwizard
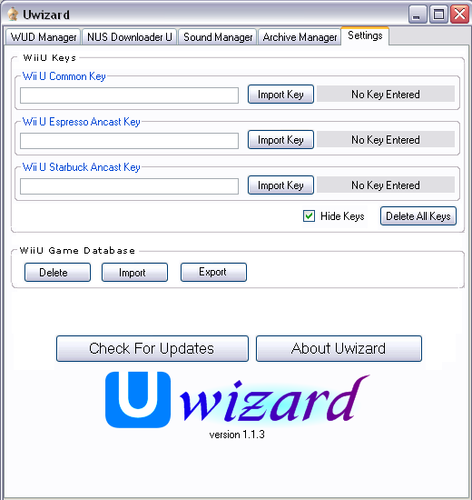
Uwizard is an all-in-one Wii U PC program.
Instructions:
To import a system key, open the settings tab, and enter the key in the text box, or click "Import" and select a .bin or.txt file that contains the key.
The open a WUD (Wii U disc image), open the WUD Manager tab, then click "Open Wii U Game Backup", then select your WUD file.
Uwizard will automatically download covers from http://www.gametdb.com/WiiU/List
You may also extract the contents of the game using Crediar's DiscU by clicking the "Extract Game Files" button.
To do this, you must enter the disc title key. Because of legal reasons, the keys are not included with Uwizard, but SHA-1 hashes are included for most games to help verify your keys.
To download a title from NUS, open the NUS Downloader U tab, then either type in the 16-character title ID, or choose a title from the list. The title version is optional. You may also decrypt and extract the contents of the title using Crediar's CDecrypt by checking the "Decrypt Contents" check box.
Use the "Add Title" button to add the currently entered title ID and version to the list. Use the "Delete Title" button to delete the selected item from the list. Use the "Clear List" button to remove all titles from the list. This includes titles that came pre-entered with Uwizard.
To decode a BFSTM Wii U sound stream to a WAV audio file, open the BFSTM Decoder tab, then click "Convert a BFSTM to a WAV", then select the input BFSTM and the output WAV. You may also display all BFSTM and WAV files within a folder in the list on the left by clicking "Select Folder".
In the settings tab, the "Check for Updates" button makes updating to the latest game list and Uwizard versions easy.
ChangeLog:
v1.1.3
German language added.
Spanish language added.
Minor bug fixes.
v1.1.2
BFWAV decoder added.
MP3 compiler added.
v1.1.1
SZS and SARC archive management added.
BFSTM multi-select and optional channel separation added.
Command line interface added.
More NUS titles added to the easy-access list.
Multiple languages added.
Minor bug fixes.
v1.1.0
NUS Downloader U added.
BFSTM decoder added.
List selection of Wii U games added.
Minor bug fixes.
v1.0.1
Option to hide keys added.
Minor bug fixes.
v1.0.0
Program Creation
Credits:
Mr. Mysterio - Programmer of Uwizard
Crediar - Programmer of DiscU and CDecrypt
MasterF0x - Distributor of BFSTM Decoder
GameTDB - Game Covers
VinsCool, capito27, Phanteon, send0r - Translation
-
WiiFlow Lite
WiiFlow Lite es una aplicación homebrew de Wii usada para mostrar y lanzar los juegos y aplicaciones almacenadas en una memoria USB o tarjeta SD conectada a una Wii o una Wii U en modo Wii.
Los juegos y aplicaciones se muestran al estilo cover flow, como se puede ver en la siguiente imagen:
Instalación
Simplemente descarga el archivo desde aquí mismo y lo extraes en la carpeta apps/wiiflow_lite de tu tarjeta SD o memoria USB. Recomendamos memoria SD. El dispositivo debe de estar formateado en FAT32.
wfl_as_wiiflow debe de ser extraído en la carpeta apps/wiiflow.
Uso
Para iniciar WiiFlow Lite necesitas Homebrew Channel o canal ya creado de WiiFlow Lite en tu Wii o vWii system menu.
Aplicación creada por Fledge68.
-
Nintendont
Un proyecto Wii Homebrew para jugar a juegos de GameCube en Wii y vWii en Wii U
Características:
Funciona en Wii y Wii U (en modo vWii) Carga a toda velocidad desde un dispositivo USB o una tarjeta SD. Carga 1:1 e imágenes de disco .GCM/.ISO reducidas. Carga juegos como archivos extraídos (formato FST). Carga imágenes de disco en formato CISO. (formato uLoader CISO) Emulación de tarjeta de memoria Reproducción de audio mediante transmisión de audio de disco Compatibilidad con mandos Bluetooth (mando clásico (Pro), mando Wii U Pro) Compatibilidad con mandos HID a través de USB Disposición personalizada de los botones al usar mandos HID Compatibilidad con códigos de trucos Configuración modificable de varios ajustes Reinicio/apagado mediante combinación de botones (R + Z + Start) (R + Z + B + D-Pad Abajo) Parcheo avanzado de modo de vídeo, forzar progresivo y forzar pantalla ancha 16:9 Arranque automático desde el cargador Cambio de disco Utiliza el adaptador oficial del mando de Nintendo GameCube Emulación BBA (ver Léame Emulación BBA) Funciones: (sólo Wii)
Reproducción de discos Reproducir copias de seguridad de DVD grabables (sólo Wii antigua) Utiliza tarjetas de memoria reales Cable GBA-Link WiiRd Permitir el uso del micrófono de Nintendo GameCube Lo que Nintendont nunca apoyará
Game Boy Player Instalación rápida:
Consigue el archivo loader.dol desde aquí mismo, renómbralo a boot.dol y ponlo en /apps/Nintendont/ junto con los archivos meta.xml e icon.png. Copia tus juegos de GameCube en el directorio /games/. Los subdirectorios son opcionales para los juegos de 1 disco en formato ISO/GCM y CISO. Para juegos de 2 discos, debes crear un subdirectorio /games/MYGAME/ (donde MYGAME puede ser cualquier cosa), y luego nombrar el disco 1 como "game.iso" y el disco 2 como "disc2.iso". Para los FST extraídos, el FST debe estar ubicado en un subdirectorio, por ejemplo /games/FSTgame/sys/boot.bin . Conecta tu dispositivo de almacenamiento a tu Wii o Wii U e inicia The Homebrew Channel. Selecciona Nintendont. Notas
Se sabe que la ranura para tarjetas SD de Wii y Wii U es lenta. Si estás usando una tarjeta SD y tienes problemas de rendimiento, considera usar un lector SD USB o un disco duro USB. Se sabe que las memorias USB dan problemas. Nintendont funciona mejor con dispositivos de almacenamiento formateados con clusters de 32 KB. (Utiliza FAT32 o exFAT). Nintendont es una aplicación creada por FIX94.
-
Bloopair
Bloopair permite conectar controladores de otras consolas como los controladores nativos de Wii U Pro en la Wii U, aplicando temporalmente parches al módulo IOS-PAD responsable de las conexiones del controlador Bluetooth.
Características
Conecte hasta 4 controladores de forma inalámbrica a través de Bluetooth Soporte para vibración Niveles de batería Controladores compatibles
Mando Pro de Nintendo Switch Nintendo Switch Joy-Con Controlador Microsoft Xbox One S / X Controlador Sony Dualsense
Instalación
Descargar la aplicación y extraerla en el directorio raíz de la tarjeta SD. Uso
Ejecute Bloopair desde WiiU Homebrew Launcher Una vez lanzado, debería abrirse el menú de Wii U Una vez de vuelta en el menú de Wii U, presione el botón SYNC en su consola y controlador Espere hasta que el controlador esté conectado Si un controlador se había emparejado en el pasado, simplemente enciéndalo nuevamente y debería volver a conectarse.
Después de reiniciar la consola o salir de la Configuración del sistema, reinicie Bloopair.
Aplicación creada por GaryOderNichts.
-
WUP Installer GX2
Esta aplicación puede instalar juegos, actualizaciones de juegos o contenidos descargables a la memoria del sistema de nuestra Wii U (NAND) o a un dispositivo USB.
WUP Installer GX2 está basada en la aplicación "WUP Installer y Mod" creada por Yardape, mientras que la interfaz gráfica está tomada del código fuente de "Loadiine GX2".
Existen 3 versiones de WUP Instlaler GX2:
La primera funciona con HBL y HBL Channel. La segunda funciona solo con HBL Channel. La tercera es el canal instalable de WUP Installer GX2.
Agradecimientos:
Al equipo de Loadiine GX2 por el código fuente de la interfaz gráfica. A Yardape por el código fuente del instalador. A brienj por el soporte rpx. Aplicación creada por djskual.
-
DiscU
A Windows Tool that can Extract and Decrypt Wii U Game Images in WUD Format
New in this Release:
Fixes wrong IV in sys part Adds content extraction for WUP install Few other minor changes & fixes. -
Aroma
Aroma es una colección de herramientas para usar homebrew en la Wii U.
Características
Las herramientas, módulos y plugins de Aroma son modulares, lo que significa que se pueden añadir o eliminar características fácilmente.
Una instancia de Aroma por defecto viene con las siguientes características:
Compatibilidad con el último firmware (5.5.5/5.5.6). Punto de entrada libre y persistente (incluyendo un instalador + opción de coldboot) Compatible con los puntos de entrada existentes (browser exploit) Fácil configuración y actualización: sólo hay que copiar los archivos en la tarjeta SD. Compatibilidad incorporada con los módulos Integración incorporada del sistema de plugins de Wii U Todos los módulos y plugins utilizan un montón de memoria independiente para mejorar la estabilidad Los plugins y las aplicaciones homebrew pueden utilizarse al mismo tiempo. Uso
Extrae los archivos a la raíz de tu tarjeta sd Inicia el entorno a través del EnvironmentLoader. Es posible que tengas que mantener la tecla X mientras lanzas el EnvironmentLoader para forzar la apertura del menú. Aroma es una aplicación creada por Maschell.
-
wiiSXR
PSX Emulator for Wii U & Wii.
QUICK USAGE:
ISOs can be .bin/.cue (Make sure .cue contains _relative_ directory!), .img, or .iso format To install: Extract the contents of wiiSXR-beta2.2.zip to the root of your SD card For SD/USB: Put ISOs (.bin/.cue or other formats) in the directory named /wiisxr/isos, All save types will automatically be placed in /wiisxr/saves For DVD: ISOs may be anywhere on the disc (requires DVDxV2 on Wii) For actual BIOS: Put SCPH1001.BIN in the directory on SD/USB named /wiisxr/bios Load the executable from the HBC or in the loader of your choice Once loaded, select 'Load ISO' and choose the source and select the ISO to load (Note: to go up a directory select '..', B will exit the file browser) Select 'Play Game' to play The game can be exited any time by pressing a configurable key combination together on a GC pad (START & X), Classic Controller (HOME), Wiimote (- & +), Wiimote+Nunchuck (1 & 2), or the reset button (Note: this must be done to save your game; it will not be done automatically) CONTROLS:
Controls are now fully configurable so any button on your controller can be mapped The controller configuration screen presents each PSX button and allows you to toggle through sources There are 4 configuration slots for each type of controller To load a different, previously saved configuration, select the slot, and click 'Load' After configuring the controls as desired, select the slot, and click 'Save' After saving different configurations to the slots, be sure to save your configs in the input tab of the settings frame Clicking 'Next Pad' will cycle through the PSX controllers assigned There is an option to invert the Y axis of the PSX's analog sticks; by default this is 'Normal Y' The 'Menu Combo' configuration allows you to select a button combination to return to the menu SETTINGS:
General Native Saves Device: Choose where to load and save native game saves Save States Device: Choose where to load and save save states Select CPU Core: Choose whether to play games with pure interpreter (better compatibility) or dynarec (better speed) Save settings.cfg: Save all of these settings either SD or USB (to be loaded automatically next time) Video Show FPS: Display the framerate in the top-left corner of the screen Screen Mode: Select the aspect ratio of the display; 'Force 16:9' will pillar-box the in-game display Input Configure Input: Select controllers to use in game Configure Buttons: Enter the controller configuration screen described above Save Button Configs: Save all of the controller configuration slots to SD or USB Auto Load Slot: Select which slot to automatically be loaded for each type of controller Audio Disable Audio: Select to mute the sound Saves Auto Save Native Saves: When enabled, the emulator will automatically load saves from the selected device on ISO load and save when returning to the menu or turning off the console Copy Saves: Not yet implemented Delete Saves: Not yet implemented CREDITS:
* WIISXR fork: mystro256 * WIISXR logo: iiiGerardoiii * General Coder: emu_kidid * Graphics & Menu Coder: sepp256 * Audio & Core Coder: tehpola * Artwork: drmr * USB 2.0 support: matguitarist * LibWUPC integration: Daxtsu * LibWUPC: https://github.com/FIX94/libwupc * pcsx team http://www.pcsx.net/ * pcsx-df http://pcsx-df.sourceforge.net/ * pcsxr http://pcsxr.codeplex.com/ * pcsx 1.5-test3 mac version by Gil Pederson http://pcsx.gpost.dk/ * P.E.Op.S. PSX Gpu & SPU http://sourceforge.net/projects/peops/ * franspu * CDRMooby * SSSPSX * Compiled using devKitPro -
Loadiine GX2
Loadiine is a WiiU homebrew. It launches WiiU game backups from SD card. Its Graphical User Interface is based on the WiiU GX2 graphics engine.
Credits
Dimok Cyan Maschell n1ghty dibas The anonymous graphics dude (he knows who is ment) and several more contributers -
NKit
NKit is a Nintendo ToolKit that can Recover and Preserve Wii and GameCube disc images
Recovery is the ability to rebuild source images to match the known good images verified by Redump
Preserve is the ability to shrink any image and convert it back to the source iso
NKit can convert to ISO and NKit format. The NKit format is designed to shrink an image to it's smallest while ensuring it can be restored back to the original source data. NKit images are also playable by Dolphin
by nanook.
-
JWUDTool
Here is just a simple program that uses the Jnuslib. The usage should be pretty self explaining.
STILL EXPERIMENTAL. Bugs may occur, please report them!
Features
Compressing .wud and splitted wud files into .wux Decompressing a .wux back to .wud Extracting from the GI or GM partition Extracting .app/-h3/.tmd/.cert/.tik files from a .wud/.wux or splitted .wud Extracting just the contents/hashes/ticket. Decrypting the full game partition from a .wud/.wux or splitted .wud Decrypting specific files the game partition from a .wud/.wux or splitted .wud Verify a image / Compare two images (for example a .wud with .wux to make sure its legit) Usage
Optional:
Copy the common.key into the folder next to the .jar or provide the key via the command line Copy the game.key into the folder next to the wud image or provide the key via the command line usage: -commonkey <WiiU common key> Optional. HexString. Will be used if no "common.key" in the folder of this .jar is found -dev Required when using discs without a titlekey. -compress Compresses the input to a .wux file. -decompress Decompresses the input to a .wud file. -decrypt Decrypts full the game partition of the given wud. -decryptFile <regular expression> Decrypts files of the game partition that match the regular expression of the given wud. -extract <all|content|ticket|hashes> Extracts files from the game partition of the given wud (Arguments optional) -help shows this text -in <input file> Input file. Can be a .wux, .wud or a game_part1.wud -noVerify Disables verification after (de)compressing -out <output path> The path where the result will be saved -overwrite Optional. Overwrites existing files -titlekey <WUD title key> Optional. HexString. Will be used if no "game.key" in the folder of the wud image is found -verify <wudimage1|wudimage2> Compares two WUD images to find differences Examples
Getting .app files from an Wii U Image:
Extract .app etc. from a WUD:
Get .app files from "game.wud" to the folder "extracted" with game.key in the same folder
java -jar JWUDTool.jar -in "game.wud" -out "extracted" -extract all Extract .app etc. from a WUX (compressed WUD):
Get .app files from "game.wux" to the folder "extracted" with game.key in the same folder
java -jar JWUDTool.jar -in "game.wux" -out "extracted" -extract all Extract .app etc. from a splitted WUD (dump with wudump):
Get .app files from "game_part1.wud" to the folder "extracted" with game.key in the same folder
java -jar JWUDTool.jar -in "game_part1.wud" -out "extracted" -extract all Compressing into .wux examples:
Compress a .wud to .wux:[/B]
Compress a "game.wud" to "game.wux"
java -jar JWUDTool.jar -in "game.wud" -compress Compress a splitted game_part1.wud to .wux:
Compress a "game_part1.wud" from a wudump dump to "game.wux"
java -jar JWUDTool.jar -in "game_part1.wud" -compress Decryption game files examples:
Decrypt a WUD image to game files
Input can be a .wud, game_part1.wud or a .wux. This decrypted the full game partition. Given a game.key and common.key in the same folder.
java -jar JWUDTool.jar -in "game.wud" -decrypt //WUD java -jar JWUDTool.jar -in "game.wux" -decrypt //WUX java -jar JWUDTool.jar -in "game_part1.wud" -decrypt //game_part1 Decrypt a single file from an WUD
Input can be a .wud, game_part1.wud or a .wux. This decrypted the full game partition. Given a game.key and common.key in the same folder.
Extracting the code/app.xml file.
java -jar JWUDTool.jar -in "game.wud" -decryptFile /code/app.xml java -jar JWUDTool.jar -in "game.wux" -decryptFile /code/app.xml java -jar JWUDTool.jar -in "game_part1.wud" -decryptFile /code/app.xml Extracting all .bfstm files.
java -jar JWUDTool.jar -in "game.wud" -decryptFile /.*.bfstm java -jar JWUDTool.jar -in "game.wux" -decryptFile /.*.bfstm java -jar JWUDTool.jar -in "game_part1.wud" -decryptFile /.*.bfstm Extracting the folder /content/Sound
java -jar JWUDTool.jar -in "game.wud" -decryptFile /content/Sound/.* java -jar JWUDTool.jar -in "game.wux" -decryptFile /content/Sound/.* java -jar JWUDTool.jar -in "game_part1.wud" -decryptFile /content/Sound/.* Compiling
clean assembly:single package
Credits
Maschell
Thanks to:
Crediar for CDecrypt
All people who have contributed to vgmtoolbox
Exzap for the .wux file format
FIX94 for wudump
The creators of lombok.
-
Haxchi
This is the continuation of the POC Haxchi exploit by smea.
It features compatibility with a lot of DS VC and can be easly installed and further configured.
Installation
Just extract the contents of it onto your sd card. The "haxchi" folder right now just consists of a simple replacement icon, logo and replacing the game title with "Haxchi", its example config.txt will boot homebrew launcher by default and a fw.img on your sd card when holding A. For a full list of all compatible buttons that you can use for the config.txt go here.
The content of this haxchi folder can be changed to your liking - if you want to you can also add in an alternative bootSound.btsnd to replace the original startup sound which I did not do in this example haxchi folder.
After setting up the content to your liking all you have to do is run the Haxchi Installer in homebrew launcher, select the game you want to install it on and that is it! If you ever want to make changes to the content folder it installed to then just re-run the Haxchi Installer and install it again, you dont have to reinstall the game beforehand, it'll just overwrite the previous haxchi installation with your new data.
Please note, this will ONLY WORK WITH DS VC GAMES ON NAND, if you have a ds vc game on USB you want to use then please move it to your NAND first and ideally detach your usb device before using this installer .elf, if you dont remove your usb devices it may freeze up on exiting or not install properly.
This also ONLY LOADS THE .ELF VERSION OF THE HOMBEBREW LAUNCHER which as of right now is v1.4 so make sure to keep that on your sd card or you will just get error -5 when starting your haxchi channel. Once you are in the homebrew launcher it is also perfectly compatible with loading .rpx files, you just cant use haxchi itself to load .rpx files.
Credits
smea, plutoo, yellows8, naehrwert, derrek, FIX94 and dimok
by FIX94.
-
WUPDownloader
WUPDownloader es uina aplicación que permite descargar contenido instalable desde NUS, directamente a una tarjeta SD conectada a WiiU.
Esta aplicación no ofrece soporte para piratería. Solo descarga juegos que ya has comprado antes!
Características de WUPDownloader:
Download titles from Nintendo's servers (NUS) on the SD Card (SD:/install/) Create fake tickets at the start of a download if not found on the NUS Shows the download speed for any title Also, generate fake tickets for other downloaded titles on SD:/install/ folder (To fix missing ticket downloads) WiiU Software Keyboard library support (SWKBD) Can download System/vWii titles Complete HOME Menu support for channel version Downloaded titles can be installed with WUP Installer Download app hashes support (.h3) Custom folder names for downloaded titles Usage
To download a title, search on a Title Database for a title ID (Ex: WiiUBrew's database)
To create a fake ticket, you will need the title ID and the encryption key (Avaible on 'That title key site')
To install the app, download and unzip the contents of the latest release and depending on how you will run the app, follow the next steps:
Homebrew Launcher
Move the folder to (SD:/wiiu/apps/) Run the app from HBL through Haxchi, Browserhax or any exploit you want Home Menu
Move the folder to (SD:/install/) and install it with WUPInstaller Run it from the HOME Menu (With a CFW) by Pokes303.
-
Loadiine
RPX/RPL and File Replacement Tool.
- 1......Requirements
- 2......How to Use
- 3......Preparing the SD Card
/******************************************************************************/
/* Requirements */
/******************************************************************************/
Wii U FW 5.3.2 SD(HC) Card Super Smash Bros for Wii U (Disc or EShop version) - optional but may be needed for some games
/******************************************************************************/
/* How to Use */
/******************************************************************************/
- 1. Setup your SD Card (see below)
- 2. In the Internet Browser, launch the included kernel exploit (www/kexploit)
(You need a modified kernel exploit that sets 0xA0000000 virtual memory range to 0x10000000 physical memory address)
- 3. Relaunch the Internet Browser
- 4. Insert your SD Card into the Wii U, if it's not already done.
- 5. Launch loadiine (www/loadiine)
- Press A to install loadiine
or
- Press X to install loadiine with server enabled (use it for debug purpose, the server must be running before pressing X).
- 6. The loadiine menu should open. Now, Select your App/Game using the D-Pad.
- Press A to use Smash Bros mode and launch directly the disk
- Note : auto-launch does not work for everyone, launch manually Smash Bros instead
- Note : if you are using Smash Bros EShop version, press Y instead, it returns to Home Menu, then launch Smash Bros.
or
- Press X to use Mii Maker mode (Smash Bros disk is not needed)
- The game should start
- 7. Enjoy
- Note: When exiting the Game/Application, you must relaunch the Mii Maker and select the game again.
If you don't, launching Super Smash Bros will result in a crash.
/******************************************************************************/
/* Preparing the SD Card / How to add a Game or Application */
/******************************************************************************/
Note: You may add multiple Games/Applications, but ALL STEPS are REQUIRED
-------------------------------------------------------------------------------
Setting Up RPX/RPL and Data Files
1. Create a folder named "wiiu" in the root of the SD Card.
- ex : SDCARD/wiiu
2. In "wiiu", create another folder named "games"
- ex : SDCARD/wiiu/games
3. In "games", create a new folder with the name of your app
- ex : SDCARD/wiiu/games/MyApplication/
4. Copy the "code" folder of your app/game inside your application folder (with rpx, rpl and xml files)
- ex : SDCARD/wiiu/games/MyApplicatin/code/my_application.rpx
- ex : SDCARD/wiiu/games/MyApplicatin/code/my_application_library.rpl
- ex : SDCARD/wiiu/games/MyApplicatin/code/app.xml
- ex : SDCARD/wiiu/games/MyApplicatin/code/cos.xml
- note : if you don't have the xml files, loadiine will try to use default values instead
5. Copy the "content" folder of your app/game inside your application folder
- ex : SDCARD/wiiu/games/MyApplication/content/...
- ex : H:/MyApplication/vol/content/data.bin -> SDCARD/wiiu/games/MyApplication/content/data.bin
- ex : H:/MyApplication/vol/content/datab/datab.bin -> SDCARD/wiiu/games/MyApplication/content/datab/datab.bin
Note : Do not rename RPX and RPL files
-------------------------------------------------------------------------------
Summary
Your file structure should look like this if the above information was used :
- SDCARD/wiiu/games/MyApplication/code/my_application.rpx
- SDCARD/wiiu/games/MyApplication/code/*.rpl [only if application contains .rpl files]
- SDCARD/wiiu/games/MyApplication/code/app.xml
- SDCARD/wiiu/games/MyApplication/code/cos.xml
- SDCARD/wiiu/games/MyApplication/content/[content files/folders]
/******************************************************************************/
/* Limitations : */
/******************************************************************************/
- The total size of each RPX and RPL files must be less than 65.7 MB (tested up to 47.3 MB)
- Don't go in the wiiu settings it breaks everything
/******************************************************************************/
/* Notes : */
/******************************************************************************/
- If you have problems with saves, try delete your Smash Bros saves.
/******************************************************************************/
/* Special thanks : */
/******************************************************************************/
- To everyone involved in libwiiu and webkit/kernel exploit !
- To the testers !
Feel free to modify and improve this software.
Golden45.
Dimok.
-
USBLoaderGX
Game backup loader for Wii and vWii
USBLoaderGX is a GUI for Waninkoko's USB Loader, based on libwiigui.
It allows listing and launching Wii games, Gamecube games and homebrew on Wii and WiiU vWii mode.
Its interface, based on the official theme from Nintendo Wii, is easy to use and perfect for kids and all the family. A lot of options are available and directly editable from the loader's interface.
by cyan06 & dimok789.
-
WiiU Homebrew Launcher
The Homebrew Launcher is a WiiU homebrew that lists homebrew applications located on a SD card and permits launching them (similar to the Homebrew Channel of the Wii).
Usage
To use the Homebrew Launcher (or HBL, for short) you must copy homebrew_launcher.elf into SD:/wiiu/apps/homebrew_launcher/homebrew_launcher.elf, and run the installer throught your WiiU browser.
The apps that will be listed are should be in the following path /wiiu/apps/homebrew_name/some_elf_name.elf on the root of the SD card. A meta.xml and an icon.png (256x96) are optional. Here is an example:
sd:/ wiiu/ apps/ homebrew_launcher/ homebrew_launcher.elf meta.xml icon.png loadiine_gx2/ loadiine_gx2.elf meta.xml icon.png ddd/ ddd.elf meta.xml icon.png ftpiiu/ ftpiiu.elf meta.xml icon.png by dimok789.
-
Homebrew App Store
Description
Homebrew App Store allows you to download homebrew apps for HBL directly in the app. Installed apps can also be reinstalled, updated, or deleted. It is an attempt at a poor man's Cydia for Wii U!
Apps featured within HBAS are made by other homebrew developers. If anyone takes an issue with their work being distributed in this manner, contact the respective repository owner.
Although "store" is in the name, the apps within are all free-- If a specific homebrew developer wants to charge for their app, they would have to do so outside of HBAS. The name just refers to the concept of an App Store.
Requirements
- Internet connection - SD card - A way to run HBL (see stickies) How to Use Unzip the "appstore" folder from the zip at the above download link. This is the bundled HBAS app. Place this folder inside the /apps/wiiu/ folder on your SD card. After this, run HBL and select it from the menu.
Once the app launches, press A or touch the screen to dismiss the splash screen. You can scroll with either stick, the D-pad or the touch screen. To download an app, touch its icon and choose "GET".
Guide:
LOCAL - An app that is only on your SD card INSTALLED - An app on your SD card and the server UPDATE - An app on your SD card and the server, with a different version number GET - An app only on the server Changelog
It's been a while, but here's the second release of the HBAS!
In particular, the 1.5 release seeks to address major crashing/freezing issues as well as a way to help sift through the growing number of apps on the store.
There are a lot of much needed changes in this build:
Icons are cached and no longer load asynchronously (#20 and #6) Categories added based on web frontend (#13) App loading restructured, more Stabiity™ (#14) "Random" button added to help discover new apps App re-themed to mimic the new wiiubru.com Elf is 35% smaller Minor text fixes -
CDecrypt
Aplicación para Windows que nos permite desencriptar el contenido de los archivos NUS.
-
Snes9xRX
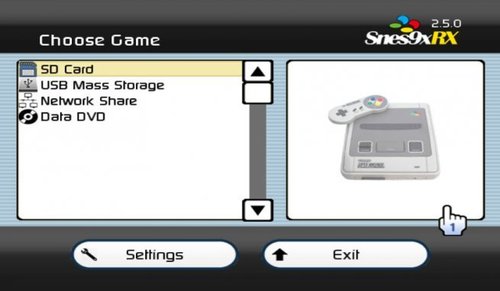
Snes9x RX is a Super Nintendo™ / Super Famicom emulator for the Nintendo Wii and Wii U. Snes9x RX is a fork from Snes9x GX, a port of Snes9x.
Snes9x RX is a "homebrew application" which means you will need a way to run unsigned code on your Nintendo Wii/Wii U.
Features
Based on Snes9x 1.52 Wiimote, Nunchuk, Wii Classic/Classic Pro, and Gamecube controller support Wii U Pro, NES and SNES Classic controller support SNES Superscope, Justifier, Mouse peripherals emulation support Cheat support Auto Load/Save Game Snapshots and SRAM Custom controller configurations SD, USB, DVD, SMB, Zip, and 7z support Autodetect PAL/NTSC, 16:9 widescreen support Original/filtered (Sharp & Soft))/Unfiltered video modes Turbo Mode - up to 2x the normal speed Zoom option to zoom in/out Open Source! -
JsTypeHax
It loads WiiU Homebrew Launcher, I successfully haxchied a 5.5.2 ;)
Currently in beta test, you can follow this guide to use it:
Prepare the needed files
Prepare your FAT32 SD card with Homebrew launcher, and preferably Haxchi installer to get a persistent and more stable entry point for homebrew.Extract the homebrew launcher 1.4 on your SD card.
sd:/wiiu/apps/homebrew_launcher/homebrew_launcher.elf
If you plan to install Haxchi, be sure you already have a compatible NDS game installed on NAND. Prepare any other homebrew you want to use, for example Homebrew App Store. Find a web host or create your own
Visit a website hosting it, like http://dlae.life/, http://wiiu.insanenutter.com, http://www.wiiubru.com/x or http://u.drg.li/ or host the sources on your computer. If it's on your computer, you need python installed, and launch "startServer.bat" on windows, or use any other webserver you want. Run the browser hack on WiiU
Clear your browser's data, launch the browser again. Open the server's URL in your browser, or your computer's IP if you are hosting it yourself. select Exploit If it freezes, shutdown and try this step again. It can be quick if you are lucky, or taking hours of retries... If it works, use that opportunity to install haxchi, it will be more stable. Note: As it is still in beta test phase, http://u.drg.li/ is hosting different versions of that exploit. You should prefer it over other currently available web hosts, and select exploits from delta 0 to 4 until one works (2 seems to be the one is working the most).
If your screen goes grey-white but your console freezes, that's the correct delta, so keep trying that exploit number.
by JmpCallPoo.
-
Universal controller driver for Nintendont
Use your Switch Pro Controller, Xbox One Controller and more controllers wirelessly on Nintendont.
by Missingphy.
-
vWii Nand Restorer
Restore your vWii NAND backups from your Wii U.
How to use
Copy your nand backup to sd:/vwiinandrestorer/slccmpt.bin and place your keys.bin/otp.bin in the same folder Copy the .elf to sd:/wiiu/apps Run cfw (mocha or haxchi) I recommend doing a slccmpt + otp backup with Wii U Nand dumper before using this tool.
Please make sure that the keys.bin/otp.bin are from the console where the NAND Backup is from or else decryption will fail!
Restore NAND
This will clear your SLCCMPT, extract the nand backup to your slccmpt and fix permissions
Additional Options:
Extract NAND
Extracts your NAND to sd:/vwiinandrestorer/extracted Clear SLCCMPT
This clears your SLCCMPT Copy extracted NAND to SLCCMPT
Copies everything from sd:/vwiinandrestorer/extracted to your SLCCMPT This can be useful if you have an already extracted NAND Backup that you want to restore Fix modes
This fixes the modes of your SLCCMPT Needed after copying file to the SLCCMPT by GaryOderNichts.
-
Ultimate Wii U Hack Script
This is a set of batch scripts that automate many things.
Features
Wiivc Injector Script
Injection of Wii games, Gamecube, Wii homebrews and Wiivc Chan Booter thanks to a modified version of Wiivc Injector Script 2.2.6. Backup, restore and reset various parameters. Create a blacklist to prevent an injection from having the same Title ID. Injectiine
Injection of games NES, SNES, GBA, N64 and NDS thanks to a modified version of Injectiine. Backup, restore and reset various parameters. Create a blacklist to prevent an injection from having the same Title ID. Other features
Installation of required elements while using scripts (Java 8). Set up the necessary files for the basic Wii U hack, the v-wii hack, the Haxchi installation or the CBHC installation. For more information, see this page of the documentation. Creation of a web server to host the browser exploit locally for system versions 5.5.0, 5.5.1 and 5.5.2 of the Wii U. Unbrick the V-wii part, see this page of the documentation for more information. Block or allow the console firmware update by deleting / restoring the correct folder via Wup_server, see this page for more information on the changed folder. Known bugs:
The injection of a game via Wiivc Injector Script will crash or give a game that does not work if it is run from a medium formatted in FAT, FAT16 or FAT32. This problem can not be corrected because a temporary file is obligatorily more than 4 GB during the injection and therefore poses a problem on media formatted in FAT, FAT16 or FAT32. Using quotation marks or exclamation points in user input causes the script to crash. When a console output made by an "echo" is performed, this produces an error in the log file. The UTF-8 encoding seems to be the cause of this problem but I have not found how to solve it for now. In Wiivc Injector Script, if the Wii game is splited (except for "wbfs" files) and its path or name contains an accent or any other symbols refused by Wit, the script will not work, even with the attempted fix. errors. For now, the script for extracting the MLC dump from Wii U nand does not allow extraction to a folder in a path with spaces and is forced to manipulate files that should not not be necessary but Wfs-extract does not seem to want paths with spaces, I'm looking for a solution. Credits:
There is really too much to thank for all the projects included in this script but I thank each contributor of these projects because without them this script could not even exist (some are credit in the documentation). I also thank all those who help me to test the scripts and those who suggest me new features.
by shadow2560.
-
Recientemente actualizado
-
Novedades populares


