Switch
414 archivos
-

Switch Remote Play
Switch Remote Play es una aplicación que nos permite jugar en Switch a juegos de PC de forma remota, de una forma similar a lo que lo hace Steam Link o el Remote Play de Sony o el servicio similar que tiene Microsoft para Xbox).
Este proyecto está inspirado en In-Home-Switching y SkyNX. El objetivo es crear una aplicación cliente y streamer estable para poder jugar a los juegos de PC de forma remota en Nintendo Switch.
In-Home-Switching y SkyNX ya ofrecen esta funcionalidad, pero les faltan algunas características que me ha parecido conveniente añadir, a la vez que practico con C++.
Nota
El flujo de video depende de la CPU, ya que en este momento utiliza la opción ffmpeg de hwaccel auto, lo que generalmente hace que ffmpeg elija la CPU para el proceso de captura de pantalla. En mi fase inicial de creación de prototipos, encontré que elegir la opción de GPU AMD para ffmpeg conducía a resultados de transmisión inconsistentes. Veré la posibilidad de configurar la opción hwaccel en el futuro, pero por ahora solo tenga en cuenta que la CPU es importante.
Si está jugando un juego que consume mucha CPU, existe una alta probabilidad de que la transmisión tenga saltos o contratiempos. Si su CPU es débil, entonces será difícil que produzca y empuje los cuadros lo suficientemente rápido.
Para mi PC, cuando juego Nier Automata no hay contratiempos y puedo obtener cerca de 60 fps dependiendo de la configuración de transmisión (resolución de escritorio de 1280 x 720 y tasa de bits de 5mb / s). Pero cuando intenté jugar RE3 2020 a 30 o 56 fps, tenía hipo y saltos. Así que tenga esto en cuenta.
Características
El sistema no se bloquea cuando se va a dormir (la transmisión se desconectará y la aplicación se puede cerrar) Aplicación de escritorio para alojar la transmisión de conexión remota Transmita la entrada desde el interruptor a la conexión remota Transmita audio desde la conexión remota al conmutador Conecte automáticamente aplicaciones de transmisión de PC y conmutador Silenciar automáticamente la PC cuando el audio se transmite al Switch Permitir la configuración manual del conmutador a la conexión a PC Configurar los ajustes de transmisión desde el conmutador Desconectar / volver a conectar la transmisión a voluntad Cambiar el modo de entrada a ratón Alternar el modo de entrada al controlador DS4 (PS4) Alternar el modo de entrada al controlador Xbox General tips
Preset value controls how the encoder should work: ultrafast means the encoder performs to get the image out as fast as possible ignoring quality, and veryslow means the encoder can take its time to preserve image quality. Codec value can help performance however I have tested both the AMF and standard h264 and don't notice much of a difference. Quality control factor is what controls how good the image should be. The lower the value the harder your PC must work to maintain quality. (this value and 'Preset' are what will dictate your CPU's workload) For more info see the ffmpeg documentation. Config examples
Great image quality config: Preset - veryslow Quality control factor - less than 10 (0 = perfect image) Bitrate - around 5000 - 8000 Vsync Mode - variable frame rate Latency oriented config: Preset - ultrafast Quality control factor - 20+ Bitrate - around 5000 Vsync Mode - variable frame rate I haven't tested all configuration combinations (and these are dependent on my PC specs), so if you find one that works great please feel free to send it to me with your PC specs and network environment configuration 🙂
Rare crash when opening some homebrew apps
The crash issue in v0.7.2 has been found and patched. (it was due to the network discovery feature not being shutdown correctly) The app still crashes however it is harder to reproduce now and I haven't found a proper 100% way to reproduce the crash yet. The current crashing issue is rare and only crashes hbloader/hbmenu when opening an app after streaming for a certain while. I can't reproduce it but it's gone for now. If anyone figures out how to reproduce the crash, please let me know.
Agradecimientos
jakibaki for the original In-Home-Switching switch application DevL0rd for the updated streaming application SkyNX FFmpeg for an exhaustingly extensive library nefarius for the ViGEm Client SDK. It's such a nice SDK/library to use rdp for screen-capture-recorder. Made streaming audio via FFmpeg on PC very easy SwitchBrew for libNX devkitPro bloody legends for letting us have a toolchain to compile stuff for the Switch SciresM, TuxSH, hexkyz, and fincs for Atmosphere. Absolute madlads these lot are. Also a shoutout to the champs that help contribute to the repo. Jonathan Dearborn for SDL_FontCache cucholix for the app icon 🙂 Aplicación creada por Moehammered.
-
Switch Safety
Verifying the MD5 of Switch files
Features:
Compatible with Windows only Get MD5 files and compare them with an online hosted master document Search files Progress bar (the analysis of some large files may take some time) It will download the text document on your PC from a reliable online web host. The application will display a message box informing you if the file is secure -
Switch Screenshot Organiser
Utility for organize the screenshots from Switch.
Fonctionnalities :
- Copy screenshots of your Micro SD to a specified folder - Displays the screenshot of unknown games for you to identify Once identified, they will automatically be copied to the correct folder - Copy screenshots and videos - Game IDs and name pairs in GameIDs.txt make editing and sharing easy Limits :
- Can not preview videos - No progress bar - Windows or Windows form only Use :
- Select your Switch album folder (for example, D: \ Nintendo \ Album). - Select the folder where you want your screenshots sorted. - Press the start button - Enter the name of the game shown in the screenshot - Note that the ignore button will skip the current screenshot if you do not know which game it is, but will copy it if the game is later identified. -
Switch SD to NSP Dumper (SwitchSDTool)
This is a tool used to dump NSP files from the games/dlc/updates you legitimately obtained from the e-shop.
This is done through obtaining a nand backup via hekate, the required console specific keys via biskeydump from your switch, along with other keys via kezplez needed for hactool. It also requires googling for eticket_rsa_kek.
For minimal ban risk, Delete your wifi connection profiles, put your switch into airplane mode, BACKUP YOUR NAND, run biskeydump, follow the instructions for running kezplez to get keys.txt, RESTORE YOUR NAND.
At the end of this, you will then need hac disk mount to dump PRODINFO.bin, and mount the SYSTEM partition.
How to dump NSPs from your SD card for the First time
Step 1: Put your Switch into Airplane mode and remove ALL wifi connection profiles. (Safety measure to avoid a potential ban.) Step 2: Follow the tutorial at https://gbatemp.net/threads/backup-restore-your-nand-get-your-biskeys-tseckeys-keys-txt-guide.513386/ to dump your nand, keys.txt and biskey dump. Step 3: Restore the nand back up, if you have not already done so via above tutorial following the dumping of biskey.txt and keys.txt. (Safety measure to avoid a potential ban.) Step 4: Grab Hac Disk Mount. Step 5: Power off your switch. Mount the SD card from your switch to your PC. Step 6: Open up hac disk mount with Administrator Priveleges. (This is mandatory in order to install the Virtual Drive driver.). Step 7: Open up rawnand.bin in hac disk mount. Step 8: Double click on PRODINFO Step 9: Open up biskey.txt and copy in the Crypto and Tweak keys from Bis Key 0, then click on Test. Make sure the result says Entropy OK. Step 10: Click on Browse in Dump to File, and browse to the location where you extracted this tool to. Step 11: Click on Start. Step 12: Click on the X. we are done with PRODINFO. Step 13: Double click on System. Step 14: Copy in the Crypto and Tweak keys from Bis Key 2, the click on Test. Make sure the result says Entropy OK. Step 15: Install the Virtual Drive driver. (If it errors, you need to reopen Hac disk mount with administrator priveleges.) Step 16: Click on Mount. Step 17: Copy keys.txt from the SD card to where you extracted this tool. Step 18: Open the tool. (If it errors, make sure you have installed .NET Framework 4.7.1) Step 19: Click on Select SD Folder. Choose the Drive that the SD is mounted to. Step 20: Click on Select System Path. Choose the Drive letter you mounted the SYSTEM partition to. (A drive by default.) Step 21: Click on Select Decryption Path. Choose where you want the decrypted NCAs to reside. Step 22: Click on Select NSP Output Path. Choose where you want your NSP dumps to be saved. Step 23: Google for eticket_rsa_kek. (if your keys.txt doesn't already contain this key.) Step 24: Paste the results in the text field that says "Replace me with the actual eticket_rsa_kek.". Step 25: The Log should say "ETicket RSA KEK is correct.". If it does not, go back to step 22 and try harder. Step 26: Click on "Find SD Key". The log should say "SD Key Loaded". Step 27: Click on Load RSA KEK. The log should have two entries. "E-Ticket RSA Key Encryption Key loaded successfully" and "RSA Key extracted successfully from PRODINFO.bin". Step 28: Click on Extract Tickets. Log should say "Dumping Tickets" followed shortly by "Done. x Tickets dumped". Step 29: Click on Decyrpt NCAs. Log should show a bunch of "Processing --file--.nca - Decrypting, Done. Verifying, Verified. (May start with Joining, Done). Step 30: Click on the Games Tab, then Click on Parse NCAs. This should finish, and all of your games present on the SD card should be listed, along with any Updates and DLC. Step 31: Click on your preferred language, and move it to the top by click on Move Up. Repeat for each preference, setting them one below the top, etc... Step 32: Click on Pack ALL NSPs to pack everything, or select a game, and click on Pack Selected NSP to pack that NSP only. Step 33: Close the tool. Step 34: Unmount the SYSTEM partition and close hac disk mount. Step 35: Unmount the SD card and put it back into your switch. How to Dump NSPs from new purchases / updates since last dumping
Step 1. Dump your nand, following the guide at https://gbatemp.net/threads/backup-restore-your-nand-get-your-biskeys-tseckeys-keys-txt-guide.513386/ (Provided you saved biskey and keys.txt, you won't need to redump those.) Step 2: Power off your switch. Mount the SD card from your switch to your PC. Step 3: Open up hac disk mount with Administrator Priveleges. (This is mandatory in order to install the Virtual Drive driver.). Step 4: Open up rawnand.bin in hac disk mount. Step 5: Double click on System. Step 6: Copy in the Crypto and Tweak keys from Bis Key 2, the click on Test. Make sure the result says Entropy OK. Step 7: Click on Mount. Step 8: Open the tool. Step 9: Click on "Find SD Key". The log should say "SD Key Loaded". Step 10: Click on Load RSA KEK. The log should have two entries. "E-Ticket RSA Key Encryption Key loaded successfully" and "RSA Key extracted successfully from PRODINFO.bin". Step 11: Click on Extract Tickets. Log should say "Dumping Tickets" followed shortly by "Done. x Tickets dumped". Step 12: Click on Decyrpt NCAs. Log should show a bunch of "Processing --file--.nca - Decrypting, Done. Verifying, Verified. (May start with Joining, Done). Step 13: Click on the Games Tab, then Click on Parse NCAs. This should finish, and all of your games present on the SD card should be listed, along with any Updates and DLC. Step 14: Click on Pack ALL NSPs to pack everything, or select a game, and click on Pack Selected NSP to pack that NSP only. Step 15: Close the tool. Step 16: Unmount the SYSTEM partition and close hac disk mount. Step 17: Unmount the SD card and put it back into your switch. -
Switch Signature Patches (SigPatches)
Sigpatches de Nintendo Switch para Atmosphere (cargado vía fusee-primary.bin) y Hekate.
¿Cómo instalar los Signature Patches?
Descargar la última versión desde aquí mismo. Descomprimir el archivo y dependiendo de si usamos Hekate (fusee-secondary.bin) o Atmohspere (fusee-primary.bin), pasar el indicado al directorio raíz de la tarjeta SD (nos pedirá sobreescribir archivos y carpetas, lo hacemos sobrescribiendo y fusionando, respectivamente) Nota: Si no sabemos que versión necesitamos tendríamos que verificar el archivo hekate_ipl.ini de la carpeta /bootloader/ de la tarjeta SD. Si no tenemos ese archivo, utilizar la versión para Atmoshpere (fusee-primary.bin). Si vemos la línea payload = bootloader / payloads / fusee-primary.bin en su archivo hekate_ipl.ini, necesitamos la versión para Atmosphere.
Si ve la siguiente línea fss0 = atmosfera / fusee-secundaria.bin en su archivo hekate_ipl.ini, necesitamos la versión para Hekate. Listo, ahora al arrancar Atmosphere ya estaría usando los SigPatches. Parches pata Hekate (Modo EZ)
Si queremos iniciar nuestro CFW con Hekate, se recomienda que cargar en cadena fusee-primary. Este es el mejor método para iniciar Atmospehre sin presionar directamente fusee-primary.bin.
Para cargar en cadena Atmosphere, coloca el último fusee-primary.bin en / bootloader / payloads /, luego edita el archivo hekate_ipl.ini para que contenga lo siguiente,
[Atmosphere CFW] payload = cargador de arranque / payloads / fusee-primary.bin Creado por iTotalJustice.
-
Switch sys-patch
Sys-Patch es un módulo de sistema tipo script que parchea fs, es, ldr y nifm en el arranque.
Configuración
sys-patch presenta una configuración simple. Puede editarse manualmente o actualizarse mediante la superposición.
El archivo de configuración se encuentra en /config/sys-patch/config.ini. El archivo se genera una vez que el módulo se ejecuta por primera vez.
[options] patch_sysmmc=1 ; 1=(default) patch sysmmc, 0=don't patch sysmmc patch_emummc=1 ; 1=(default) patch emummc, 0=don't patch emummc enable_logging=1 ; 1=(default) output /config/sys-patch/log.ini 0=no log version_skip=1 ; 1=(default) skips out of date patterns, 0=search all patterns Overlay
El overlay se puede utilizar para cambiar las opciones de configuración y ver qué parches se han aplicado.
Sin parche significa que el parche no se aplicó (probablemente no se encontró). Parcheado (verde) significa que fue parcheado por sys-patch. Parcheado (amarillo) significa que ya fue parcheado, probablemente por sigpatches o una construcción personalizada de Atmosphere. ¿Qué se está parcheando?
He aquí un breve resumen de lo que se está parcheando:
fs es ldr nifm fs y es necesitan nuevos parches después de cada nueva versión de firmware. ldr necesita nuevos parches después de cada nueva versión de Atmosphere. el parche nifm ctest permite que el dispositivo se conecte a una red sin necesidad de conectarse a un servidor.
Los parches se aplican en el arranque. Una vez hecho, el sys-module deja de ejecutarse. La huella de memoria (16kib) y el tamaño binario (~50kib) son ambos muy pequeños.
PREGUNTAS FRECUENTES:
Si ya estoy usando sigpatches, ¿tiene sentido usar esto? Sí, en 3 situaciones. Es necesario crear un nuevo parche ldr después de cada actualización de Atmosphere. A veces, se lanza una nueva actualización silenciosa de Atmosphere. Esta herramienta siempre parcheará ldr sin tener que actualizar los parches. Construir Atmosphere desde src requerirá que generes un nuevo parche ldr para ese Atmosphere construido a medida. Esto es bastante fácil debido a los scripts / herramientas públicas que existen por ahí, sin embargo esto siempre será capaz de parchear ldr. Si olvidas actualizar tus parches cuando actualizas tu firmware / Atmosphere, este sys-module debería ser capaz de parchear todo. Así que puede ser utilizado como un fall back. ¿Significa esto que debo dejar de descargar / utilizar sigpatches? No, personalmente recomendaría seguir utilizando sigpatches. La razón es que si esta herramienta se rompe alguna vez, es probable que no sea rápido para arreglarlo. sys-patch ha sido creado por ITotalJustice.
-
Switch Theme Injector
Switch Theme Injector es una aplicación para crear y editar temas personalizados para Nintendo Switch.
Todos los firmwares superiores o igual al 5.0.0 están oficialmente soportados, mientras que firmwares más antiguos pueden ser compatibles pero no han sido testeados.
La aplicación es bastante sencilla de usar: los temas están en formato SZS y se extraen del menú de inicio RomFS, abre un szs compatible, abre una imagen de 1280x720 para usar como fondo y haz clic en guardar.
Principales características de Switch Theme Injector:
Lockscreen, home menu and user settings support for firmwares 5.0 up to 6.1.0 From 6.0 support for news applet and console settings as separate szs files, on <=5.x it's all in common.szs Older firmwares have been confirmed to work but are not officially supported Auto image injection, no external tools needed. Support for custom layouts, with built-in examples Auto image to DDS conversion Auto NCA Extraction to easily extract the SZS files from the home menu (based on hactool) Advanced tools to help people develop custom layouts or patches Web version with Auto-Theme to share themes No installation is needed, just extract the files and run the main exe, this app requires .NET Framework 4.6, and works on linux through wine (Some features like image to DDS and NCA extraction are windows only).
Aplicación creada por exelis11.
-
switch-nfp-mitm
Man-in-the-middle the Nintendo Switch's nfp:user service to spoof Amiibos, modified to disable the log file so you can use ftp properly.
-
switch-sys-tweak
A collection of miscellaneous mitms that may eventually grow as stuff gets added.
Features
FEAT_NSVM_SAFE : Mitm's ns:vm->NeedsUpdateVulnerability to always return 0 (enable using web applets on outdated fws). Toggles
TOGL_LOGGING : Enable logging to "sdmc:/sys-tweak.log" How to compile
Add the required flags to your make command line. FEAT_ALL and TOGL_ALL are available as wildcard flags.
Example: make FEAT_ALL="Y" TOGL_LOGGING="Y"
Note: You should probably make clean if you change the flags you're using.
by p-sam.
-
SwitchBru Network
It's an enabler for webapplet (Thanks to XorTroll for discovering that) who make possible to access internet without DNS.
It point to dns.switchbru.com The 4TU Dashboard and permit to watch video and Browse Google !
Happy Browsing to everyone !
by Thomhack.
-
SwitchExplorer
A simple GUI-based NCA explorer (also compatible with NSPs and XCIs).
Requires key files in %USERPROFILE%/.switch/prod.keys and %USERPROFILE%/.switch/title.keys.
-
SwitchGuide-Updater
This is an updater for Atmosphere + Hekate.
It does not install Atmosphere or Hekate. To do that, you should follow switchguide.xyz. This program instead updates the following files:
fusee-primary and fusee-secondary. (The main components of Atmosphere containing the bootloader and KIP files.)
creport (Very important module to redirect switch error reports to the SD card.)
update.bin (Hekate 4.x+ loads update.bin if it exists.)
Written using pyNX.
To use this:
Install pyNX using the Homebrew browser. Download switchguideupdater.py from here. Copy it to your SD to the switch/pyNX folder Run pyNX from the HBL and select switchguideupdater.py. You'll need to run the updater at least once for both Hekate and Atmosphere to make it save the current version.
Credits:
pyNX discord for helping me out with using pyNX/imgui.
-
SwitchIdent
Esta es otra herramienta de identidad que continúa la serie de <nombre del dispositivo aquí>ident. Esta herramienta permite a los usuarios obtener varios bits de información de su dispositivo Nintendo Switch, de ahí el nombre 'ident' como en la identificación de su Nintendo Switch.
Funciones:
Muestra la versión del firmware del sistema. Muestra el tipo de hardware y la unidad. Muestra el número de serie. Muestra el ID de DRAM. Muestra el ID del dispositivo. Muestra la región del sistema. Muestra los relojes de la CPU, GPU y EMC. Muestra si el conmutador está en estado acoplado/portátil. Muestra la dirección IP. Muestra los tamaños de almacenamiento para SD, NAND (usuario) y NAND (sistema). Muestra varios estados del sistema. (Bluetooth, WLAN, NFC, etc.) Muestra el porcentaje de batería y el estado de carga. Muestra si la carga de la batería está activada. Muestra si se suministra suficiente energía. Muestra las señales RSSI inalámbricas y su calidad. Muestra el estado del voltaje de la batería. Muestra el número de lote de la batería. Muestra el estado de las ranuras SD y para tarjetas de juego. Muestra la dirección MAC de WiFi y Bluetooth. Muestra la edad de la batería (en porcentaje y pcm). Muestra la temperatura interna (PCB). Muestra la temperatura externa (SoC). Muestra el límite de corriente de entrada y salida del cargador de batería. Muestra el límite de corriente de carga de la batería. Límite de tensión de carga de la batería. Muestra la capacidad (pcm) y la antigüedad (pcm) de la batería. Muestra la tensión media de la batería. Muestra el tipo de cargador de batería. Límite de corriente de carga de la batería. Límite de tensión de carga de la batería. Muestra la temperatura de la batería. Muestra el estado del puerto de auriculares. Muestra la batería del joy-con. Muestra el firmware del joy-con. SwitchIdent es una aplicación creada por joel16.
-
SwitchMe
After Wiring in the SwitchME you can access the bootloader by conecting a usb-c cable directly to the switch. Make sure you have a compliant ucb-c cable first though! A compliant cable will have a 56k Ohm resistor (check where you perchased your cable from) Really shouldnt be an issue if you are just flashing the SwitchMe directly from your computer, but be on the safe side as plenty of people have burned up their charge IC using 3rd party docks and cheap usb-c cables.
If you want to preflash the SwitchME connect a usb cable directly to the the board (D+ green) (D- white) (5v red) (gnd black) On first connect to your computer it will already be in bootloader mode ready to be flashed. After you have flashed the device for the very first time you will need to double press the button to go into bootloader mode again if you want to reflash the device, or if you connect the reset line you can do the same.
*** If you have Auto RCM enabled DISABLE it until you flash the SwitchME for the first time (Use CTCaer 4.1 ***
*** If you flash any other payload other than CTCaer 4.1 after enabling Auto RCM you will not have a way to flash the SwitchME unless you can boot into Horizon because there is no usb data comms while in RCM (for now) ***
*** If you get stuck because of Auto RCM and only booting to say BISkeydump, the way around this is to disconnect either D+ or D- Boot into Horizon, reconnect the line and than flash the SwitchME bootloader ***
*** Again this is only if you have Auto RCM enabled ***
*** We highly suggest you only use CTCaer 4.1 and put whatever payload you want to boot in the payloads dir from the SDCard files ***
*** We have included some for you ***
or Pre-Compiled payloads check UF2_SwitchME_Payloads
To compile payloads for SwitchME you will need to install the Arduino IDE https://www.arduino.cc/en/Main/Software
~ Next you must install the board manager for SwitchME ~
Open Arduino IDE > Preferances > Additional Boards Manager URLs > Add The URL Below https://raw.githubusercontent.com/Aboshi/SwitchME/master/package_switchme_index.json
Next go to Tools > Board > Boards Manager > Type SAMD > Select Arduino SAMD Boards and Install version 1.6.21
Next search for rebug and install
You can now select SwitchME m0 in the board programmer
To compile different payoads you must first convert your payload.bin to hex The easiest way is to use binConverter.py (you can find it under releases) Open SwitchME.ino Change ctcaer_4.0_hekate.h to whatever you named you payload If you want to upload directly to your SwitchME just click on upload (your SwitchME is ready for use) If you want to compile to make a .bin for converting to UF2 select Sketch > Export compiled Binary
You can find all the tools you need in the releases section of this git as well as pre compiled payloads in UF2 format We will provide plenty of payloads in UF2 format and keep them updated with new releases.
Wiring Diagrams: Check wiring dir 4_wire_always_on (Do not use this method any longer) Leaving it in the git for reference only 4_wire_on_at_powerup (when used with auto rcm you will get instant bootup to whatever you flahed the SwitchME with) We highly suggest CTCaer payloads! More diagrams will be added soon with auto rcm line strapping, emmc cutoff (another auto rcm) and many others. For now you can check this thread for other wiring methods that suit your needs: https://gbatemp.net/threads/internal-modchip-samd21-trinket-m0-gemma-m0-itsybitsy-m0-express-guide-files-support.508068/
Huge thanks to @mattytrog for adding the SwitchMe to the current list!
Custom Firmware and Emulators:
Roll your own: https://www.sdsetup.com/ ^^ Thanks to @noahc3 & @tomGER
Or Download an AIO package: https://github.com/tumGER/SDFilesSwitch/releases ^^ Tkanks to @tomGER for keeping things up to date
The SwitchME also has 3.5mb of storage space. You can access it by putting the SwitchME into bootloader mode (double press the button)
Greets to all the devs in the Switch scene without them none of this would be possible: @SciresM @hexkyz @naewhert @oct0xor @ktemkin @CTCaer @rajkosto @Reisyukaku @atlas44 @noemu @st4rk and countless others
by Aboshi.
-
SwitchPresence-Rewritten
Change your Discord rich presence to your currently playing Nintendo Switch game!
Simply Create an application at the Discord Developer Portal call your application Nintendo Switch or whatever you would like and then enter your client ID and switch's IP into the SwitchPresence client!
You can also optionally dump game icons using a helper homebrew included in releases it will also give you the option to toggle the SwitchPresence sysmodule!
After you have dumped the icons you can bulk upload them to your Discord Developer Application under Rich Presence->Art Assets you can upload them with the name given to them on dump or optionally upload your own icon and set the SwitchPresence client to load that icon using the name of the custom icon.
Technical Info
The protocol for the sysmodule is a very simple struct sent via TCP
struct titlepacket { u32 magic; //Padded to 8 bytes by the compiler u64 tid; char name[512]; };
Please note that magic is padded to 8 bytes which can be read into a u64 if wanted
The Packet is sent about every 5 seconds to the client from the server (in this case the switch).
If a client is not connect it will not send anything.
by SunTheCourier.
-
SwitchScanner
Scan or enter your Nintendo Switch's serial number to find out if it is Unpatched and vulnerable to the fusee-gelee hack!
If vulnerable to this hack, homebrew is possible and in your future.
This Android app uses serial information from forums all over the web to check your Switch's serial number.
by BassInvadr.
-
SwitchTime
Change NetworkSystemClock.
Credit
@thedax for NX-ntpc, from which this project is forked. Functionality
Change time by day/hour Contact a time server at http://ntp.org to set the time back to normal Disclaimer
This program changes NetworkSystemClock, which may cause a desync between console and servers. Use at your own risk! It is recommended that you only use the changed clock while offline, and change it back as soon as you are connected (either manually or using ntp.org server.)
by 3096.
-
SwitchTools
Apps included:
NSCBuilder TegraRCmGUI SAK (Conversion NSP/XCI/NSZ/XCZ) Update
by Zoria.
-
SwitchTV
Twitch client for the Nintendo Switch.
Installation
Download the latest file and unzip. Copy .nro to /switch/ directory on your sd card Launch SwitchTV from the hbmenu
Disclaimer
This project is very barebones in its current state. If the demand is high enough, I may make a custom GUI to allow for a more seamless and feature-rich experience.
Feel free to contribute ideas and/or point out bugs on the Issues page, and I will get around to them when I have the time.
Thanks
All the work done by devkitPro and the team at switchbrew for the libnx libraries.
by butforme.
-
SX Autoloader
Thanks to our friends at Team [WAIN] they have released an small 'add-on' to our SX OS v2.9.2 which allows you to 'auto-load', what that means now you just find the game you have previously played on your Horizon Home Screen, click on it, and even if it is a dumped cartridge in XCI format, as long as you still have the files on your Micro SD-Card, it will now auto-mount the cartridge backup for you and launch it, no more getting upset seeing the 'insert the game card' message, then having to go to Album, launch our SX OS menu, scroll-over and find the game, and mount it and go back.
As long as you have at least mounted your XCI image once via our SX OS menu, now you can just simply click on a XCI Game Icon and it will Auto-Mount and Launch for you directly from the Horizon Home Screen. Is that not amazing! Only one small minor note about this release, is that it currently only scans your Micro SD-Card for the matching XCI game files, and support for USB HDD usage will be coming in a later revision.
This add-on mod is simple to install also, just download and unpack the .RAR to the root of your Micro SD-Card, and next time you boot-up your Switch console you will be able to enjoy the Quick and Ease of playing all your XCI games without any extra 'button' pushing, just click and wait 2 seconds or less at the 'Insert Game Card' screen as the system magically finds your backup cartridge and mounts it for you all in the background and then just enjoy playing!
by Team [WAIN].
-
SX Cheat Tool
This is a program I made to allow people ot make SX OS cheat codes easier. This does not require prior knowledge of the codetypes.
You can get cheat codes from: SX OS Cheats or Cheat Codes AMS and SX OS.
SX OS Cheat Hacker Guide
--[ 1. Introduction
This small guide attempts to shed some light on finding your own cheat codes for Switch games using the SX OS Cheat finder as well as detailing the specifics about the SX OS Cheat Code Format.
--[ 2. Address Space Layout Randomization
The Nintendo Switch Operating System (Horizon OS) implements Address Space Layout Randomization (from here on ASLR) for every process. What this means is that the absolute base address of for example a game's executable or a game's heap memory are not fixed in stone. SX OS does *not* disable this ASLR as it would effectively make your console less secure. The downside of this is that you as a cheat hunter will need to keep this in mind when finding cheats, but we've tried our best to encapsulate/hide these details at a high level.
When working with pointers in the SX OS Cheat Engine you can have three different type of pointers:
* MAIN - memory addresses/pointers relative to the game's NSO executable * HEAP - memory addresses/pointers relative to the start of the game's heap * BASE - memory addresses/pointers that are neither part of MAIN/HEAP, they are displayed a relative to the address space base (usually 0x8000000) Throughout the SX OS Cheat finder every memory address is thus displayed as: [MAIN+xxxx], [HEAP+xxxx], [BASE+xxxx]
When writing actual cheat codes you need to specify what kind of address you are reading/writing from, we support reading/writing from/to both MAIN and HEAP memory.
Remember that having cheat codes which write to a magic HEAP address are most of the time not very stable/reliable cheat codes, because the layout of the HEAP is not always fully deterministic and often times depends on how someone navigates through a game. In these cases it is better to study the game logic more and find pointers (or pointers to pointers, etc.) until you traced back to an address that resides in MAIN (a pointer in BSS or RO for example). At the end of this guide you will find a small case study of how the included codes for "Mega Man Legacy Collection" work.
--[ 3. SX OS Cheat Code Format
SX OS Cheat Codes are loosely inspired by older cheat engines such as Action Replay.
While old Action Replay cheat codes usually had a fixed width per code, some code types in the SX OS cheat engine can have a different length.
Cheat codes are placed inside the sxos folder on your microSD card. In order for SX OS to pick up your cheat codes they need to be correctly placed in the right subfolders. This subfolder format works like this: /sxos/titles/<titleID>/cheats/<buildID>.txt
Where titleID is the titleID of the game and buildID are the first 8bytes of the game's build ID formatted as ascii hexadecimals. Both the titleID and buildID for a running game are displayed below the SXOS logo when you navigate to the cheats tab in the SX OS Menu. The buildID is needed to properly deal with different versions of the same game, which might lead to incompatibilities for cheat codes.
When SX OS detects you have cheats on your SD cards for the currently running game but the buildID mismatches, it offers you to copy over the cheats from the other buildID to the one of the version you are currently running, if you want to experiment with (or fix) the compatibility of certain cheat codes.
A basic cheat code definition will look like this:
[Infinite Health] 11111111 22222222 11111111 22222222 11111111 22222222 Where 'Infinite Health' is the displayed name of the code and the lines containing '11111111 22222222' are all the codes that belong to this cheat.
The cheat engine supports up to 16 'scratch' registers which can be used for arbitrary purposes like stashing offsets or memory locations.
There is one special type of code. The "master code" which is not defined by enclosing the name in '[' and ']' but using '{' and '}' instead. The master code cannot be disabled and is executed before any other (enabled) cheat code. These exists to avoid duplication in multiple cheats which share certain characteristics.
An example of master code usage can be seen in the case study for the "Mega Man Legacy Collection" cheats you will find further down in this guide.
Below is an overview of the various code types currently implemented in the SX OS Cheat Engine.
# Code Type 0: Write to memory
0TMR00AA AAAAAAAA YYYYYYYY (YYYYYYYY)
T = width of write (1/2/4/8) M = memory type (0 = main nso, 1 = heap) R = register to be added as offset A = address relative to (M) With code type 0 you can do a write to memory.
# Code Type 1: Conditional statements
1TMC00AA AAAAAAAA YYYYYYYY (YYYYYYYY)
T = width of comparison value (1/2/4/8) M = memory type (0 = main nso, 1 = heap) C = Condition to use for comparison A = Address relative to (M) Y = Value to compare against List of valid conditions:
- 1: Greater Than
- 2: Greater Than or Equal To
- 3: Lower Than
- 4: Lower Than or Equal To
- 5: Equal To
- 6: Not Equal To
# Code Type 2: End of conditional statement
20000000
This code type terminates an conditional block (Code type 3 or 😎
# Code Type 3: Looping
300R0000 VVVVVVVV
R = Register to use for loop counter
V = Loop count
310R0000
This code type is used at the end of the loop, use the same R value as for the start of the loop.
# Code Type 4: Load register with value
400R0000 VVVVVVVV VVVVVVVV
This code type will load one of the registers with a specific value
R = Register to be filled
V = Value to be put in register
# Code Type 5: Load register with value from memory
5TMRI0AA AAAAAAAA
T = Width of value to be loaded from memory (1/2/4/8)
M = memory type (0 = main nso, 1 = heap)
R = Load from register index
I = Load from register flag, set to 1 to load from register R instead of address A
A = Address relative to (M)
# Code Type 6: Store value to memory address from register
6T0RIor0 VVVVVVVV VVVVVVVV
T = Width of value to be stored to memory
R = Register index containing the memory address
I = Increment register flag, set to 1 to increment the register by T after storing
o = add additional offset from register 'r'
r = offset register index
V = value to be stored to memory
# Code Type 7: Apply arithmic operation to register
7T0RC000 VVVVVVVV
T = Width of value (1/2/4/8)
R = Register index to apply arithmic operation to
C = Arithmic operation to apply:
0 = addition, 1 = subtraction, 2 = multiplication, 3 = shift left, 4 = shift right
V = Value to be used during arithmic operation
# Code Type 8: Check for buttons being pressed
8kkkkkkk
k = keypad value to check against. the hex values for the various keys are:
0000001 - A
0000002 - B
0000004 - X
0000008 - Y
0000010 - Left Stick Pressed
0000020 - Right Stick Pressed
0000040 - L
0000080 - R
0000100 - ZL
0000200 - ZR
0000400 - Plus
0000800 - Minus
0001000 - Left
0002000 - Up
0004000 - Right
0008000 - Down
0010000 - Left Stick Left
0020000 - Left Stick Up
0040000 - Left Stick Right
0080000 - Left Stick Down
0100000 - Right Stick Left
0200000 - Right Stick Up
0400000 - Right Stick Right
0800000 - Right Stick Down
1000000 - SL
2000000 - SR
Multiple button values can be combined by OR'ing them together. For example A+B becomes 0000003, and A+B+X+Y becomes 000000f.
This code type otherwise behaves the same as the conditional code type 1.
--[ 4. Using the Cheat Finder in SX OS
SX OS Comes with a cheat searcher functionality that will help you in identifying the memory locations you need in order to write your own cheat codes. You start by launching a game, when you reach a point in the game where you want to start searching for cheats you hit the home button, and navigate to the album viewer (SX OS Menu).
You can start a cheat search by navigating to "Cheat Searcher" in the cheat tab of the SX OS menu. You will be prompted to pick what kind of value you want to start a cheat search for. If you dont know the answer you can try to approximate it. Lets say you want to hunt down the memory location of your in-game coins, and you know that you can accumulate over 1000 coins, you know for sure the data type you are looking for is gonna be bigger than 8-bit. This takes some experimentation and expertise to get used to.
Once you select the data type a memory dump for the running game will be created on your microSD card. This initial memory dump will take a while, it is advised to use a fast microSD card with enough free space. If you are looking for a specific/exact value, you can now select "Next Search" and pick "Exact Value", here you can enter the exact value you're looking for (in hexadecimal). Once the comparison is done it will tell you how many candidate memory locations it found and whether they are few enough to manually explore.
If there's too many candidates left, you simply exit the SX OS Rom Menu and go back to the game. Try to grab/lose some coins (or whatever item you're trying to cheat) and head back into the SX OS menu's cheat tab, pick "Next Search" and specify the condition. This can be "exact value" again if you know the value you're looking for, or simply "less than" if you know you just lost some of the desired item/stats. Keep iterating the searches until the cheat searcher tells you there's few enough candidate memory locations left for you to start exploring manually.
Manually exploring memory location candidates can be done by going to "View candidates" in the cheats menu. When you select a candidate from the list you will be brought to the builtin hex editor where you can change the values at these memory locations. Once you change a value you can go back to the game and see if your change had any/the desired effect to help in concluding whether you found the right memory location.
--[ 5. Case Study of "Mega Man: Legacy Collection" cheat codes.
Currently we only provide a single example of working cheat codes. We would love to spend all of our time on finding more cheats, but we have different priorities. 😉
The cheats we found are a slightly interesting example though of the various code types the SX OS Cheat Engine currently offers.
Mega Man: Legacy Collection is a collection of old Mega Man games originally released for the NES back in the day. The switch "port" of these games is actually a NES emulator in disguise. The meat of our Mega Man cheat codes hinges on the "master code" which finds the virtual NES' memory start address, from there we can apply any RAM patches to the NES memory as we wish. Let's have a look at how this works.
The full master code looks like this:
-- 8< ------------------------ {Master Code} 580f0000 00d3a2a0 580f1000 038cb840 580f1000 00000008 780f0000 0000000f -- 8< ------------------------ The usage of '{' and '}' indicates that this is a master code, eg. a code that cannot be disabled and is always ran at the start of your cheat code list.
Lets break down the master code line by line:
580f0000 00d3a2a0 Code type 5 is 'Load register with value from memory', here we load a 8 byte (64bit) value, relative from MAIN (0) into register 'f' (15). The offset from the start of MAIN is 0xd3a2a0.
In pseudocode this would be something like:
register_f = read64(MAIN + 0xd3a2a0) The next line reads:
580f1000 038cb840
This one is very similar to the first code, but notice how we have an '1' there. if you look this up in the SX OS Code Format description above you can see this is the 'Load from register flag'. If set to '1' we will take the address from the register specified in the register index field rather than a memory location relative from MAIN or HEAP. In pseudocode this would be:
register_f = read64(register_f + 0x38cb840) The following line '580f1000 00000008' is more of the same, this time reading the next pointer from offset 8, or in pseudocode:
register_f = read64(register_f + 0x8) Then finally we we end with '780f0000 0000000f'. Which uses code type 7 to do some basic arithmic to the memory location in register f. In pseudo code this would be:
register_f = register_f + 15
So in essence all the "master code" does is follow a bunch of pointers and eventually end up with a pointer in register F that holds the start of the virtual NES' memory. This register f value can then be used in any cheat codes that need to write/read from the virtual NES' memory in order to give Mega Man exciting super powers! 😉
Let's have a quick look at one of the game specific cheat codes for Mega Man 1:
[MM1 Infinite Health] 400e0000 00000000 0000006a 610f01e0 00000000 0000001c The first line '400e0000 00000000 0000006a' is using code type #4 to load a register with a specific value. In this case we load register E with value 0x6a. 0x6a is the RAM offset for Mega Man's health.
The following line '610f01e0 00000000 0000001c' is using code type #6, which is "Store value to memory address from register" to write to this location.
Here we say write a 1 byte (8bit) value to the address: register_f + register_e.
The value to be written is 0x1c, the maximum value Mega Man's health can have in Mega Man 1.
--[ 6. Closing Words
We hope this guide outlines the possibilities of the cheat engine and the
need for decent master codes a bit. We are looking forward to many community
contributions with new cheat codes and of course suggestions for improving our
cheat code finder and engine.
Yours Sincerely, Team Xecuter -- Rocking the switch in 2018 and beyond!
Credits
DarkFlare for the program and idea Team Xecuter for SX OS and codetypes -
SX Core & SX Lite Firmware
La última actualización del SX Core y el SX Lite, que debemos aplicar utilizando la aplicación SX Updater.
No es necesario su uso si ya estamos ejecutando la versión 3.0.3 de SX OS.
-
SX Dumper
This homebrew application can be used to dump your retail game cartridges to your microSD card or USB hard disk. Simply place the NRO file on your SD card and launch the application from the homebrew tab in the SX OS Menu.
As the name indicates it, this app will allow you to dump an original game to your mSD card or USB HDD and then play directly with your backup without the need of the original game anymore.
This version 1.0.0 is already packed with features, and we are already working on the next update(s) to bring you an even smoother experience.
Dump to .XCI Automatically filenaming (full gamename.xci) USB HDD & mSD Card support Trimmed dumping (removed unused space from backup) Certificate wiping Splitting files for fat32 filesystem. CRC checking dumped image. –< Team-Xecuter – Rocking the Switch in 2018 and beyond! >–
-
SX Gear
Hello ,
This week the early adopters of our SX Gear dongle should be getting their product in!
Most are early SX OS users who couldn't wait for SX Pro to start shipping but were quickly missing the convenience, ease of use and safety of the SX Pro Dongle and jig. SX Gear is fully compatible with SX OS. You can purchase a license separately, or use an existing SX OS license that you have and use the regular SX OS boot.dat file. You now own a SX Pro, in red color :)
Also, many Switch owners asked us for an official Team Xecuter product that will allow them to use other (opensource) payloads. Team Xecuter provides the best quality product and users know it is best to stick to the brand they trust to make sure they have a device they won't have to replace after 50 boots. Or worse, one that would damage their precious Switch.
SX Gear is Team Xecuter's solution for the opensource community. To use it with your favorite payload, simply download the SX Gear `boot.dat' file from our website. Place this `boot.dat' file in the root of your microSD card together with the `payload.bin' file of your choice and the payload will run as soon as you power on your switch!
That's it for today folks! Keep an eye out for the upcoming SX OS v2.0!
—< Team-Xecuter - Rocking the Switch in 2018 and beyond! >—
-
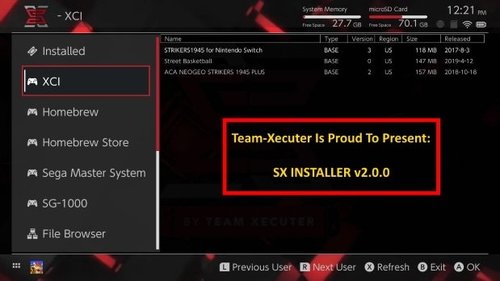
SX Installer
SX Installer is an application for advanced title management, installation and launching.
Features:
- Ability to display games as a table or icons. - Installation of NSPs from FTP, HTTP, NUT, SD, USB hard disk and NAND. - Ability to ignore the firmware requirements during installation. - Possibility of adding several security installations. - Ability to search titles. - Ability to list and delete tickets. - Ability to export all keys installed on the system. - Ability to overclock to install faster in certain situations. - Translation of the user interface in 12 languages. - Translation title of metadata in 12 languages. - Ability to download and view game graphics (Internet connection required). - Ability to list, view and delete application records (allows you to uninstall a DLC or an update) - Ability to list installed titles and start them (launch is possible only on 5.x and lower) - Ability to list XCI and launch them automatically (launch is possible only 5.x and lower) - Ability to list and install new games available, with the ability to install all new games - Ability to automatically install the latest patch and all DLC with a game. - Ability to protect users from accidentally executing unsigned code by blocking the installation of all unsigned codes unless explicitly enabled. - Ability to list and install the latest updates available for your games, with the ability to install any updates - Ability to list and install the latest downloadable content available for your games, with the ability to install all downloadable content. - Ability to list all incomplete installations (such as when the SD is corrupted or to exchange SD cards without copying data), with the possibility of reinstalling them all. - Ability to list and start NES, SNES, N64, GB, GBA, SMS, SG, SCD, GG and SG1000 RetroArch games. - List and launch Homebrew applications - File Browser that allows you to browse file systems, delete files (SD only) and copy files (only SD writing is writable)