Windows, macOS y Linux
101 archivos
-

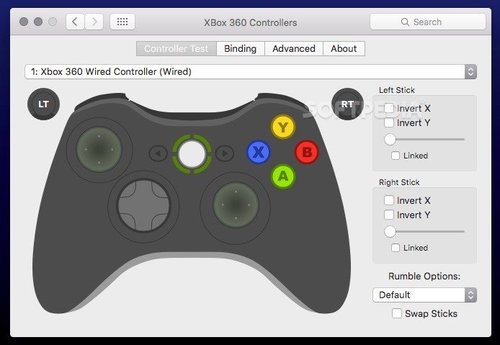
Xbox Controller Driver for macOS
This driver supports on mac OS X the Microsoft Xbox series of controllers including:
Original Xbox
Original Xbox controllers are supported by using a USB adapter. Xbox 360
Wired Xbox 360 controllers are supported directly. As of macOS 10.11, Wireless Xbox 360 controller support causes kernel panics. This issue cannot be resolved with minor changes to the driver, and requires that the driver be re-written from scratch to resolve the issue. Due to an excess of caution, we have disabled Wireless Xbox 360 controller support as of 0.16.6. If you want to use a wireless controller, download 0.16.15 or earlier and disable the driver before the computer enters a "sleep" state in order to prevent kernel panics. Alternatively, you can revert to a macOS version before 10.11 to avoid this issue. Wireless Xbox 360 controllers are supported with the Xbox 360 Wireless Gaming Receiver. Using a "Play and Charge" kit is not supported. Xbox One
Xbox One controllers are supported when connected with a micro USB cable. Using the controller with the Wireless Adapter is not currently supported. Bluetooth capable Xbox One controllers (released after August 2016) are natively supported by macOS without the use of this driver. However, installing this driver will enable force feedback (which is not natively supported) and allow you to plug the controller in via USB. The driver provides developers with access to both force feedback and the LEDs of the controllers. Additionally, a preference pane has been provided so that users can configure their controllers and ensure that the driver has been installed properly. Controller support includes ALL devices that work with an Xbox series piece of hardware. All wheels, fight sticks, and controllers should work. This includes things like the Xbox One Elite controller. If your hardware does not work with an Xbox console we cannot support it. Sorry. This project is a fork of the 360Controller project originally created by Colin Munro.
-
Xbox One Controller USB Drivers For Windows PC
Los drivers oficiales de Microsoft que permiten usar el mando de Xbox One en un PC con Windows vía micro-USB.
-
snes9x
Portable Super Nintendo Entertainment System emulator.
-
mGBA for Windows & macOS
mGBA is an emulator for running Game Boy Advance games. It aims to be faster and more accurate than many existing Game Boy Advance emulators, as well as adding features that other emulators lack. It also supports Game Boy and Game Boy Color games.
Features
--------
- Highly accurate Game Boy Advance hardware support[<sup>[1]</sup>](#missing).
- Game Boy/Game Boy Color hardware support.
- Fast emulation. Known to run at full speed even on low end hardware, such as netbooks.
- Qt and SDL ports for a heavy-weight and a light-weight frontend.
- Local (same computer) link cable support.
- Save type detection, even for flash memory size[<sup>[2]</sup>](#flashdetect).
- Support for cartridges with motion sensors and rumble (only usable with game controllers).
- Real-time clock support, even without configuration.
- Solar sensor support for Boktai games.
- Game Boy Camera and Game Boy Printer support.
- A built-in BIOS implementation, and ability to load external BIOS files.
- Turbo/fast-forward support by holding Tab.
- Rewind by holding Backquote.
- Frameskip, configurable up to 10.
- Screenshot support.
- Cheat code support.
- 9 savestate slots. Savestates are also viewable as screenshots.
- Video and GIF recording.
- Remappable controls for both keyboards and gamepads.
- Loading from ZIP and 7z files.
- IPS, UPS and BPS patch support.
- Game debugging via a command-line interface and GDB remote support, compatible with IDA Pro.
- Configurable emulation rewinding.
- Support for loading and exporting GameShark and Action Replay snapshots.
- Cores available for RetroArch/Libretro and OpenEmu.
- Many, many smaller things.
#### Game Boy mappers
The following mappers are fully supported:
- MBC1
- MBC1M
- MBC2
- MBC3
- MBC3+RTC
- MBC5
- MBC5+Rumble
- MBC7
The following mappers are partially supported:
- MBC6
- MMM01
- Pocket Cam
- TAMA5
- HuC-1
- HuC-3
### Planned features
- Networked multiplayer link cable support.
- Dolphin/JOY bus link cable support.
- M4A audio mixing, for higher quality sound than hardware.
- Re-recording support for tool-assist runs.
- Lua support for scripting.
- A comprehensive debug suite.
- e-Reader support.
- Wireless adapter support.
Supported Platforms
-------------------
- Windows Vista or newer
- OS X 10.7 (Lion)[<sup>[3]</sup>](#osxver) or newer
- Linux
- FreeBSD
- Nintendo 3DS
- Wii
- PlayStation Vita
Other Unix-like platforms, such as OpenBSD, are known to work as well, but are untested and not fully supported.
### System requirements
Requirements are minimal. Any computer that can run Windows Vista or newer should be able to handle emulation. Support for OpenGL 1.1 or newer is also required.
Downloads
---------
Downloads can be found on the official website, in the [Downloads][downloads] section. The source code can be found on [GitHub][source].
Controls
--------
Controls are configurable in the settings menu. Many game controllers should be automatically mapped by default. The default keyboard controls are as follows:
- **A**: X
- **B**: Z
- **L**: A
- **R**: S
- **Start**: Enter
- **Select**: Backspace
Compiling
---------
Compiling requires using CMake 2.8.11 or newer. GCC and Clang are both known to work to compile mGBA, but Visual Studio 2013 and older are known not to work. Support for Visual Studio 2015 and newer is coming soon. To use CMake to build on a Unix-based system, the recommended commands are as follows:
mkdir build
cd build
cmake -DCMAKE_INSTALL_PREFIX:PATH=/usr ..
make
sudo make install
This will build and install mGBA into `/usr/bin` and `/usr/lib`. Dependencies that are installed will be automatically detected, and features that are disabled if the dependencies are not found will be shown after running the `cmake` command after warnings about being unable to find them.
If you are on macOS, the steps are a little different. Assuming you are using the homebrew package manager, the recommended commands to obtain the dependencies and build are:
brew install cmake ffmpeg imagemagick libzip qt5 sdl2 libedit pkg-config
mkdir build
cd build
cmake -DCMAKE_PREFIX_PATH=`brew --prefix qt5` ..
make
Note that you should not do a `make install` on macOS, as it will not work properly.
#### Windows developer building
To build on Windows for development, using MSYS2 is recommended. Follow the installation steps found on their [website](https://msys2.github.io). Make sure you're running the 32-bit version ("MSYS2 MinGW 32-bit") (or the 64-bit version "MSYS2 MinGW 64-bit" if you want to build for x86_64) and run this additional command (including the braces) to install the needed dependencies (please note that this involves downloading over 1100MiB of packages, so it will take a long time):
For x86 (32 bit) builds:
pacman -Sy base-devel git mingw-w64-i686-{cmake,ffmpeg,gcc,gdb,imagemagick,libelf,libepoxy,libzip,pkg-config,qt5,SDL2,ntldd-git}
For x86_64 (64 bit) builds:
pacman -Sy base-devel git mingw-w64-x86_64-{cmake,ffmpeg,gcc,gdb,imagemagick,libelf,libepoxy,libzip,pkg-config,qt5,SDL2,ntldd-git}
Check out the source code by running this command:
git clone https://github.com/mgba-emu/mgba.git
Then finally build it by running these commands:
cd mgba
mkdir build
cd build
cmake .. -G "MSYS Makefiles"
make
Please note that this build of mGBA for Windows is not suitable for distribution, due to the scattering of DLLs it needs to run, but is perfect for development. However, if distributing such a build is desired (e.g. for testing on machines that don't have the MSYS2 environment installed), running `cpack -G ZIP` will prepare a zip file with all of the necessary DLLs.
### Dependencies
mGBA has no hard dependencies, however, the following optional dependencies are required for specific features. The features will be disabled if the dependencies can't be found.
- Qt 5: for the GUI frontend. Qt Multimedia or SDL are required for audio.
- SDL: for a more basic frontend and gamepad support in the Qt frontend. SDL 2 is recommended, but 1.2 is supported.
- zlib and libpng: for screenshot support and savestate-in-PNG support.
- libedit: for command-line debugger support.
- ffmpeg or libav: for video recording.
- libzip or zlib: for loading ROMs stored in zip files.
- ImageMagick: for GIF recording.
- SQLite3: for game databases.
- libelf: for ELF loading.
SQLite3, libpng, and zlib are included with the emulator, so they do not need to be externally compiled first.
Footnotes
---------
<a name="missing">[1]</a> Currently missing features are
- OBJ window for modes 3, 4 and 5 ([Bug #5](http://mgba.io/b/5))
- Mosaic for transformed OBJs ([Bug #9](http://mgba.io/b/9))
<a name="flashdetect">[2]</a> Flash memory size detection does not work in some cases. These can be configured at runtime, but filing a bug is recommended if such a case is encountered.
<a name="osxver">[3]</a> 10.7 is only needed for the Qt port. The SDL port is known to work on 10.5, and may work on older.
Copyright
---------
mGBA is Copyright © 2013 – 2018 Jeffrey Pfau. It is distributed under the [Mozilla Public License version 2.0](https://www.mozilla.org/MPL/2.0/). A copy of the license is available in the distributed LICENSE file.
mGBA contains the following third-party libraries:
- [inih](https://github.com/benhoyt/inih), which is copyright © 2009 Ben Hoyt and used under a BSD 3-clause license.
- [blip-buf](https://code.google.com/archive/p/blip-buf), which is copyright © 2003 – 2009 Shay Green and used under a Lesser GNU Public License.
- [LZMA SDK](http://www.7-zip.org/sdk.html), which is public domain.
- [MurmurHash3](https://github.com/aappleby/smhasher) implementation by Austin Appleby, which is public domain.
- [getopt for MSVC](https://github.com/skandhurkat/Getopt-for-Visual-Studio/), which is public domain.
- [SQLite3](https://www.sqlite.org), which is public domain.
-
Xenia (Xbox 360 Emulator for Windows)
System Requirements
Windows 8 or later Intel Sandy Bridge or Haswell processor (supporting AVX or AVX2) A Vulkan compatible GPU (NVIDIA preferred) An XInput-compatible controller Overview
TODO
Project Origin
The project began when I (@benvanik) was between jobs and wanted to hack on something fun. I’d picked up some region-locked Japanese games when I was visiting Tokyo and was frustrated I couldn’t play them on my 360, so I started researching the 360 homebrew scene. I’d previously written a PlayStation Portable emulator and enjoyed it, noticed no one was playing with a 360 emulator, and thought ‘what the hell’. Since then it’s been an on-again off-again project done in my spare time when bored (or when @gibbed has some time and gets me excited).
Why?
Because it’s fun!
Future Plans
None! There’s a roadmap, but the project has largely achieved what I set out for it to do (waste time building something cool), and now is purely a passion project in my spare time. In addition to getting some of my favorite games to play I’m really just hacking to have fun.
-
Cemu
Cemu es un emulador de Nintendo Wii U para Windows, macOS y Linux, capaz de ejecutar la amyoría de los juegos de la consola y homebrew.
Está escrito en C/C++ y se está desarrollando activamente con nuevas características y correcciones.
Requisitos del sistema
Windows 7 (x64) o superior OpenGL 4.1 minimo (4.6 recomendable) RAM: 4 GB minimo, 8 GB o más recomendable Microsoft Visual C++ 2017 X64 Redistributable: vc_redist.x64.exe Compatibilidad con tarjetas gráficas
NVIDIA GPU: Funciona bien con los drivers más recientes. AMD GPU: Funciona bien con los drivers más recientes Intel GPU: Sin soporte oficial. Errores visuales bastante llamativos. Aplicación creada por el Team Cemu.
-
Citra
Citra es un emulador experimental de código abierto de Nintendo 3DS escrito en C++ para Windows, macOS y Linux. También cuenta con una versión para Android.
Citra emula un subconjunto de hardware 3DS y, por lo tanto, es útil para ejecutar/depurar aplicaciones caseras, ¡y también puede ejecutar muchos juegos comerciales!
Citra está creado por PabloMK7.
-
Dolphin
Dolphin es un emulador de Nintendo GameCube y Nintendo Wii para Windows, macOS, Linux y Android.
El emulador nos permite disfrutar de los juegos de estas dos consolas en alta definición (1080p) con varias mejoras: compatibilidad con todos los mandos de PC, velocidad turbo, multijugador en red, ¡y mucho más!
-
XQEMU
XQEMU is an open-source emulator to play original Xbox games on Windows, macOS, and Linux.
-
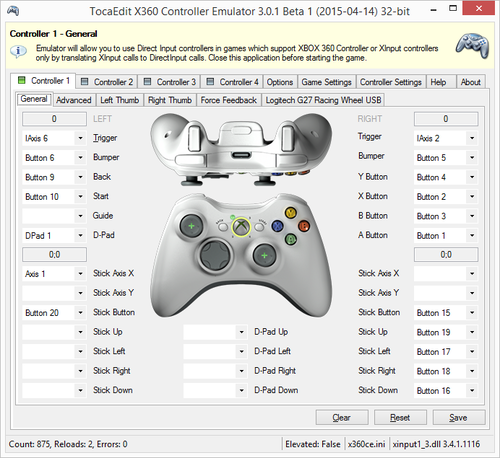
x360ce (Xbox 360 Controller Emulator)
"Xbox 360 Controller Emulator" allows your controller (gamepad, joystick, wheel, etc.) to function as an Xbox 360 controller. For example, it lets you play games such as "Grand Theft Auto" (GTA) or "Mafia II" using a Logitech Wheel.
nstallation
Run this program from the same directory as the game executable. XInput library files exist with several different names and some games require a change in its name. Known names:
xinput1_4.dll (Windows 8 / metro apps only) xinput1_3.dll xinput1_2.dll xinput1_1.dll xinput9_1_0.dll Game Database (GDB) and Configuration (INI) files can be copied to %ALLUSERSPROFILE%\X360CE on NT6 (Vista/7/8) or %ALLUSERSPROFILE%\Application Data\X360CE on NT5.1 (XP), or be left in the same directory as the game's executable (.EXE)
Note:
In most cases games based on the Source engine have the DLL placed inside the /Bin/ sub folder, as it is loaded by inputsystem.dll instead of the game executable. The DLL is not currently fully supported by the App, recent versions incorporate HookMasks and fully remove HookModes, and requires placing Version=1 under [options] in the x360ce.ini to quieten a warning about incorrect version. Uninstallation
Delete x360ce.exe, x360ce.ini and all XInput DLLs from the game's executable directory.
Troubleshooting
Some games have control issues when Dead Zone is reduced to 0%.
You may need to increase the Anti-Dead Zone value if there is gap between the moment when you start to push the axis-related button and the reaction in game.
Wheel doesn't work in the game, but it works inside x360ce Application.
Some controllers will only operate in game if they are set as "GamePad". Try to:
Run x360ce.exe Select the [Controller #] tab page corresponding to your controller. Open [Advanced] tab page. Set "Device Type" drop down list value to: GamePad. Click [Save] button. Close x360ce.exe. Run the game. Only one controller, mapped to PAD1, may work correctly in some games. Try to:
Run x360ce.exe Select the [Controller #] tab page corresponding to your controller. Open the [Direct Input Device] tab page (visible when the controller is connected). Set "Map To" drop down list value to: 1. Set "Map To" drop down list values (repeat steps 2. to 4.) for other controllers, if you have them, to: 2, 3 or 4. Click [Save] button. Close x360ce.exe. Run the game. To use more than one controller in game, you may need to combine them. Try to:
Run x360ce.exe Select the [Controller #] tab page corresponding to your additional controller. Open the [Advanced] tab page. Set "Combine Into" drop down list value to: One. Select [Options] tab page. Check "Enable Combining" check-box. (Note: Uncheck "Enable Combining" check-box when you want to configure the controller.) Click [Save] button. Close x360ce.exe. Run the game. Do I need to run x360ce Application during the game?
The x360ce.exe application can be closed before launching the game; the game doesn't need it and it uses your computer's resources. The x360ce.exe application is just a GUI for editing x360ce.ini and testing your controller.
Warning - Configuration file version does not match x360ce version.
This occurs because the current version of the application is not completely compatible with the DLL just yet. You can resolve this by adding Version=1 under the [Options] section in x360ce.ini
Controller tab won't turn green / Red light on Controller 1, 2 etc.
This can occur for a number of reasons:
The configuration utility DOES NOT work with the 64-bit library, it will only work with the 32-bit version, This is the case regardless of whether your Windows is 32-bit or 64-bit. The DInput state of the controller might be incorrect due to an application crashing previously and not unloading the controller or some other reason. Opening up Joy.cpl (Set Up USB Game Controllers) and clicking the Advanced button, and then Okaying out of the window that appears can fix it. The controller profile loaded may match the name of the controller but not actually be for the controller you own - in this case you might see button numbers or axes mapped that do not appear in the Joy.cpl test page. The controller profile might have PassThrough set. A growing number of profiles have been uploaded that do this, I have no idea why as it disables x360ce and just bloats the list of available profiles. There just might not be a profile for your control at all - The light should turn green at least once the 2 sticks, triggers and D-pad are assigned. Sometimes the application needs to be restarted after assigning these for the light to turn green. -
Cxbx-Reloaded (Original Xbox Emulator)
Cxbx-Reloaded is an emulator for running Microsoft Xbox (and eventually, Chihiro) games on Microsoft Windows.
System Requirements
Minimum
OS: Windows 7+ x64. 32-bit installations are not supported. GPU: Anything that supports Direct3D 9 (HLE) and OpenGL 3.3 (LLE). Prerequisites
Visual C++ 2015 and 2017 redistributables may be required. Download them here. -
Xqemu-kernel
An open-source Xbox kernel alternative, designed for use with XQEMU.
Introduction
XQEMU is a low-level machine emulator, which needs a copy of the Xbox system software to start and run games. Unfortunately, this system software cannot be freely distributed due to it being copyrighted material. This means that in order to run XQEMU, the user must dump the MCPX ROM and TSOP flash images from their own physical Xbox. This, of course, can be a significant barrier to entry for many users.
Though it is a goal for XQEMU to continue to maintain compatibility with the official Xbox system software, it is benificial to also have an open-source alternative path for multiple reasons, namely licensing and performance optimizations. Fortunately, the interface between title and the kernel (API) is simple, clean, and largely documented and can therefore be implemented by an open-source alternative kernel, maintaining binary compatibility with unmodified title code.
Please note: by design, this project contains no copyrighted code from the official Xbox kernel.
Current State
Currently able to boot nxdk samples with full 3D graphics! It'll be a little while before this can boot a real game.
In order to use this kernel, you'll need to use a development branch of XQEMU which facilitates loading an XBE.
What's Here
A very basic kernel that will:
Switch to protected mode Enable the serial port (printk) Perform barebones device init (PCI, VGA, etc) Read the EEPROM Poke XQEMU to load an XBE into memory Patch XBE imports with stub functions Jump to XBE entry point Handle a handful of kernel function calls What's Needed
High-level list of major things that need to be implemented next:
Core Stuff:
Proper kernel memory allocator (SLAB, SLOB might be fine) Proper virtual memory allocator for title Thread/DPC Scheduler Interrupt stuff HLE Interfaces:
XQEMU HLE File IO etc. Other Kernel things...
Rtl functions Kernel data exports Lots of other kernel stuff Getting Started
How to Build
Standard build tools and NASM are needed, then make -C src.
How to Run
Check out run.sh to see how to use this with XQEMU. Please note that you'll need the dev branch of XQEMU (mentioned above). Also note that you should not provide a bootrom image when running this kernel.
by Amborgerson.
-
PPSSPP for Windows
PPSSPP puede ejecutar y reproducir juegos de PSP en Windows en resolución Full HD. Incluso puede mejorar las texturas que de otro modo serían demasiado borrosas, ya que fueron creadas para la pequeña pantalla de la PSP original.
Incluso en PCs modernos, a menudo se puede ejecutar al doble de la resolución original.
PPSSPP es un proyecto fundado por Henrik.
-
FIFA 15 Stadium Server
This server tool will allow you to add and assign unlimited stadiums in FIFA 15, aswell overlays and intro match movies.
Features
========
Stadium Server:
Allows you to add an infinite number of stadiums to your FIFA 15 and assign them to specific teams and tournament rounds.
Overlays/Scoreboard Server:
Allows you to assign unlimited overlays (scoreboards + popups) to tournaments
Movies Server:
Allows you to assign specific intro movie files to teams or tournaments before a match
Additional Files:
Fir Park Stadium (Motherwell)
BBC Sport Intro
Three HD TV Logos
Install Instructions
============
1) Place the exe file in your FIFA 15 directory
2) Create a desktop shortcut of the stadiumserver.exe
3) Open the exe and go to About and select Help
4) You MUST read the Help/Documentation file in order to make this tool work!
Notes
==========
The tool doesn't modifies the database and therefore it's safe to use it on your saved career/tournament modes!
Tool is not compatible with online modes! (FUT, Seasons, etc)
Credits
=======
Pao4ever - Nova HD TV Logo
Razvanultra55 - BT Sport TV Logo
SG-Cesc Fabregas - Sky Sport HD1 TV Logo
Support
=======
FIFA-Infinity
http://www.fifa-infinity.com/
FIFA-Infinity Forum
http://www.fifa-infinity.com/board/
3dgamedevblog
http://3dgamedevblog.com
========================================
Made by Shawminator
========================================
COPYRIGHT
This software is provided "as is" without any warranties of any kind, either expressed or implied. Under no circumstance may the programmer(s) or the hosts of this software be held liable for any direct, indirect, incidental, special or consequential damages a rising out of the use of or inability of use of this software. You use this software at your own risk.
All trademarks are property of their respective organization.
Distribution only under author's permission and credit.
Copyright (c) 2009 - 2014 | Shawminator - FIFA INFINITY Modder. All rights reserved.
-
SwitchXBOXController
Turn your Nintendo Switch into an XBOX360 controller to play on your Windows computer
How to use
Download the latest ScpDriverInterface release and use the ScpDriverInstaller.exe in there to install the Scp drivers. Download the latest SwitchXBOXController release and execute SwitchXBOXController_Server.exe. You might have to allow network access in the firewall settings. Put the SwitchXBOXController_Client.nro in your /switch folder on the SD Card of your Nintendo Switch. Start the homebrew application using the hbmenu -
ScpDriverInterface
ScpDriverInterface uses Scarlet.Crush's SCP Virtual Bus Driver to emulate Xbox 360 controllers. Credits and major props go to Scarlet.Crush for his awesome SCP Server software, without his work this wouldn't be possible.
Usage
The binary for ScpDriverInterface is a .NET DLL file written in C#. You can get this file in the downloads section above, along with XML documentation and some other useful apps.
Just a note, the example code here is all in C#, but it should be pretty similar for other languages.
A Note on Return Values
Before we begin, I just want to mention that ScpBus's PlugIn(), Unplug(), UnplugAll(), and Report() methods will all return boolean values indicating whether or not the operation was successful (i.e. True if the operation was successful, False otherwise). While you aren't required to use these returned values, I would recommend that you do use them whenever you want to make sure that what you wanted to happen actually happened.
Creating a New ScpBus Object
After adding the DLL to your project, usage is very straightforward. First you must create a new ScpBus object:
ScpBus scpBus = new ScpBus(); Note that this will throw an IOException if ScpBus isn't able to get a handle to the SCP Virtual Bus Device (Usually this is because the SCP Virtual Bus Driver isn't installed).
Plugging In and Unplugging Virtual Controllers
Next you will want to plug in a virtual controller. Plugging in and unplugging is done with the PlugIn(), Unplug() and UnplugAll() methods. Multiple controllers can be plugged in at the same time, just use a unique controllerNumber for each separate controller. For example, this code will plug in 4 controllers:
scpBus.PlugIn(1); scpBus.PlugIn(2); scpBus.PlugIn(3); scpBus.PlugIn(4); Unplugging controllers works much the same way. If you wanted to unplug controller 3, you would use scpBus.Unplug(3);. If you wanted to unplug all currently plugged in controllers, you would use scpBus.UnplugAll();.
Sending Inputs to the Virtual Controllers
To send inputs to a controller, you use the Report() method. This method takes a 20-byte Xbox 360 controller input report, as specified here. To make this easier, ScpDriverInterface includes the X360Controller class, which can generate the report for you. To use it, first create a new X360Controller object:
X360Controller controller = new X360Controller(); Now you need to set up the state of the controller. Analog inputs (triggers and thumbsticks) are easy, just set them to the desired value (triggers use 8-bit unsigned integers, thumbsticks use 16-bit signed integers). For example, this code would set the left trigger to be fully pushed in, the right trigger to be halfway pushed in, and the right thumbstick to be pointing diagonally up and to the right:
controller.LeftTrigger = 255; controller.RightTrigger = 128; controller.RightStickX = 32767; controller.RightStickY = 32767; Buttons are also very straightforward; you can use them like flags. For example, to set A to be pressed, without affecting the states of any of the other buttons, you would use the bitwise or operator:
controller.Buttons |= X360Buttons.A; You can assign multiple buttons in a single statement. For example, this code would set A, B, Up, and the left bumper to be pressed, again not affecting the state of any other buttons:
controller.Buttons |= X360Buttons.A | X360Buttons.B | X360Buttons.Up | X360Buttons.LeftBumper; If instead of setting a button to be pressed, you just wanted to toggle its state, you would use the bitwsise xor operator. For example, this would toggle the A button:
controller.Buttons ^= X360Buttons.A; And if you wanted to set a button to be not pressed, regardless of its initial state, you would use the bitwise and operator combined with a negation. For example, this would set A to be not pressed:
controller.Buttons &= ~X360Buttons.A; Once you are done setting up the state of the controller, you can use the GetReport() method to get the 20-byte input report that can be used with ScpBus's Report() method. For example, if you had set up controller to be the state you wanted controller 2 to be in, then you would use this code to send that state to the virtual controller:
scpBus.Report(2, controller.GetReport()); Virtual Controller Rumble Data
ScpBus's Report() method can also give you rumble data about the specified controller. To get this data, add a third parameter when you call Report(), an 8-byte array that will have the controller's output report written to it. After calling Report(), you should verify that the output report it gives you is a rumble report by verifying that the second byte is equal to 0x08. If it is, then the fourth byte will have the speed for the rumble motor with the big weight, and the fifth byte will have the speed for the rumble motor with the small weight (0x00 to 0xFF in both cases).
IMPORTANT NOTE: The SCP Virtual Bus Device only returns rumble data with when the controller's rumble values have changed. This means that whenever the rumble values change, only the next call to Report() will receive those values. All subsequent calls will not receive any rumble report at all, at least not until the controller gets new rumble values. So, if you care about rumble data, you should always use the 3-parameter version of Report() (the one with the output report byte-array as the third parameter), and you should check the output report for new rumble data after every call to Report().
Here is some example code that will print the rumble data for controller 1 to the console, provided that Report() gives an output report with rumble data:
byte[] outputReport = new byte[8]; scpBus.Report(1, controller.GetReport(), outputReport); if (outputReport[1] == 0x08) { byte bigMotor = outputReport[3]; byte smallMotor = outputReport[4]; Console.WriteLine("Big Motor: {0}, Small Motor: {1}", bigMotor, smallMotor); } Disposing of ScpBus objects
Each instance of ScpBus contains a SafeFileHandle to an SCP Virtual Bus Device. If you call Close() or Dispose() on an ScpBus instance, then that SafeFileHandle will be closed immediately, and that ScpBus instance will become unusable. Whenever you are done with an ScpBus instance, you should call one of those methods to dispose of it and free up memory. If you don't then the .NET garbage collector should eventually dispose of it for you, but you have no control over how long this will take, so the object will just hang around taking up memory for some indeterminate amount of time.
-
Dual Shock 3-4 SCP Bluetooth Driver
The Dual Shock 3 driver is a custom made driver for Windows, which adds support for Dual Shock 3 controllers on Windows providing USB, Bluetooth and Native XInput support. This way you can use your Dual Shock 3 controller with PCSX2, PC games or any other emulator/game under windows.
Requirements:
Microsoft .NET 4.0 Visual C 2010 Runtime. Latest DirectX Runtime. Latest Xbox 360 Controller Drivers available. Genuine Sony DualShock3 or DualShock4 or SixAxis Controller(s). Minimum of Bluetooth 2.0 + EDR Dongle (if using Bluetooth). [DualShock4 requires minimum of Bluetooth 2.1 + EDR Dongle] Administrator rights on your PC. -
Driver Xbox 360 Controller for Windows
Drivers oficiales de Microsoft para utilizar el mando de Xbox 360 en Windows.
-
PCSX2 (PS2 Emulator)
PCSX2 es un emulador de la consola Sony Playstation 2 para Windows, macOS y Linux, que intenta replicar su funcionamiento para permitirnos jugar juegos de PS2 en nuestro ordenador.
Ventajas de usar PCSX2 sobre una PS2 original
Resoluciones personalizadas, hasta 4096x4096, suavizado y filtrado de texturas para que tus viejos juegos de PS2 se vean mejor que sus remakes de HD. Tarjetas de memoria ilimitadas Guardar estados, lo que le permite guardar y cargar rápidamente prácticamente en cualquier lugar de su juego Hacer trampas fácilmente usando nuestro sistema de parcheo pnach Use cualquier controlador (PS3, Xbox360, etc.) que funcione en Windows, teclados y ratones Aumente o disminuya la velocidad del juego usando el limitador de cuadros incorporado para pulir rápidamente o pasar puntos difíciles reduciéndolos Posibilidad de grabar en Full HD con la grabadora de video incorporada (F12 usando el complemento GSdx) -
Sims.2.No-CD.Mini-Image.SPiTFiRE
░░░░░░ ░░░░░░░ ░▒▒▒░░░░░░░░░░ ░░░░░░░░ ░▒▒░ ░░░░░░░ ░░░░░░░░ ▒█████▓░ ░▓██████▓░░▓███▓▓███████▓░ ▒███████▓▒▒████▒▓██████▓░ ░▓███████▒ ▒███████▒░▒████████▒░▓███▓▓████████░░▓████████▒▓████▓████████▓░▓████████▓ ░▓██▓▒▒▒██▒▒██▓▒▒▒▓█▓▒▒██▓▒░▓████▓▒▒ ░▓█▓▒▒▒▒▒▒░▒██▓▒▒██▓▒▒▒▒▓█▒▓██▒▒▒▒▒▒░ ░███▒ ▒█▒▒█▓░ ░▓█▒▒▓█▒ ░▓██▓░ ░▓█▒ ░▓█▒ ▒█▓░ ▒█▓▓█▓ ▒███▒ ░░░▒█▓ ▓█▒░▓█▒ ▓██▓░ ░▓█▒ ▓█▒ ▒█▓░ ▒█▓▓█▒ ░▓██▓░░░░ ▒█▓ ▓█▒░▓█▒ ▓███░ ░▓█▓░░░░░ ▓█▒ ▒█▓░ ▒█▓▓█▓▒░░░░ ▒██████▓░ ▒█▓░ ░▓█▒░▓█▒ ▓███▒ ░▓██████▓░ ▓█▒ ▒█▓░ ▒█▓▓██████▓▒ ░▓██████▒░▒██▒░░░▒▓█▒░▓█▒ ▓███▓░ ░▓███████░ ▓█▓░▒██▒░░░░▓█▒▓███████▒ ░▒▒▒▒▒█▓▒▒████████▒ ░▓█▓░ ▓████░ ░▓████▓▒▒ ▓██▒▒███▓▓▓██▓░▓████▓▒▒░ ░░░░░ ░▓█▒▒███████▓░ ░▓██▒ ▓████▒ ░▓███▓░ ▓██▓▒████████▒░▓███▓░ ░▓███▓▒░▓█▒▒████▓▒▒░ ░▓██▒ ▓████▒ ░▓███▓ ░▓██▓▒███████▓░ ▓███▓░ ░▓████▓▒▓█▒▒████▒ ▒███▓░ ▓████▒ ░▓███▓ ░▓██▓▒████▓▓█▒░░▓████▒ ▒███████▓░▒████▒ ░▓████▒░▓████░ ░▓███▓ ▒████▓████▒▒▓█▓▒▓████▓▓▓▓▒ ░▓█████▓░ ▒███▓░ ░▓████▒░▒███▓░ ░▓███▒ ▓████▓▓███▒░▒██▒▒████████▓ ░▒▒▒▒▒░ ▒▓▓▒ ▒▓▓▓▓░ ░▒▓▓░ ░▒▓▒░ ░▓▓▓▓░░▒▓▒░ ░▒▒░nfo> MuZZY ─ ─ ───────┤S P i T F i R E ─ P R O U D L Y ─ P R E S E N T S├───── - ─ ╠──────────────────────────────────────────────────────────╣ Sims 2 (c) EA Games *No-CD MINI-IMAGE* ╔──────────────────────────────────────────────────╗ │ RELEASE DATE : 17/09/04 SiZE: 1x17mb │ │ │ │ PROTECTION : SafeDisc GAMETYPE: Sim, duh! │ │ │ │ │ ╚──────────────────────────────────────────────────╝ ▄▄▄▄▄▄▄▄▄▄▄▄▄▄▄▄▄▄▄▄▄▄▄▄▄▄▄▄▄▄▄▄▄▄▄▄▄▄▄▄▄▄▄▄▄▄▄▄▄▄▄▄▄▄▄▄▄▄▄▄▄▄▄▄▄▄ ▄▄ ▄ ▄██▀ S E T U P i N F O 1. Install Sims2 do not replace the original "Sims2.exe". 2. Uninstall CloneCD if it is installed, EA have blacklisted it. 3. Mount the "Sims2_1.mir" mini-image with Daemon Tools or other. 4. Start the game as normal, you can play sims without the CD and for those unable to use build mode can now build. This will work with AlcoholClone & MONEY release but do not use the cracked non-working "Sims2.exe" that have been flying around. Use the one installed with the game and expansions shouldnt be a problem later. ▄▄▄▄▄▄▄▄▄▄▄▄▄▄▄▄▄▄▄▄▄▄▄▄▄▄▄▄▄▄▄▄▄▄▄▄▄▄▄▄▄▄▄▄▄▄▄▄▄▄▄▄▄▄▄▄▄▄▄▄▄▄▄▄▄▄ ▄▄ ▄ ▄██▀ C O N T A C T U S Are you ... a.) ... a programmer, can code your own tools or unpack custom made game file formats etc b.) ... a cracker, can crack software protections such as CD-Checks, Securom, SafeDisc, StarForce etc c.) ... both If the above applies to you, we need you to join our air-force! :) eMaiL: spitfiregroup[@]hushmail[.]com * WE DO NOT PROVIDE SUPPORT AND DON'T SEND FILES, SO DON'T ASK! * ▄▄▄▄▄▄▄▄▄▄▄▄▄▄▄▄▄▄▄▄▄▄▄▄▄▄▄▄▄▄▄▄▄▄▄▄▄▄▄▄▄▄▄▄▄▄▄▄▄▄▄▄▄▄▄▄▄▄▄▄▄▄▄▄▄▄ ▄▄ ▄ ▄██▀ G R E E T Z & R E S P E C T SPiTFiRE bow to old and new members of: RAZOR1911, FAiRLiGHT, DEViANCE, RELOADED, VENGEANCE, MONEY, iMMERSiON, HOODLUM, FASiSO, MYTH, CLASS, TECHNiC, DiViNE, VACE, SEvEN, FAS, P.O.D, iNSTiNCT, MKN ─ ─ ───────────────────────────────────────────────────────────────── ─ ─ We do this for fun only, we will try and fit SRR (Standard Rip Rules) whenever possible. If a game is reasonable from the size of the ISO we will release cos nobody else will. We use cracks made by the ISO groups generally and we apologize if this annoys you we are currently trying to learn & recruit our own crackers to do the job but until then ... sorry! ─ ─ ────────────────┬──────────────────────────┬───────────────────── ─ ─ │ SPiTFiRE - 28/08/04 │ └──────────────────────────┘ "If you like this game BUY it, good software companies should be supported!"
-
RPCS3
RPCS3 es un emulador de Playstation 3 multiplataforma y de código abierto, escrito en C++, para Windows y Linux.
Requisitos de hardware
Los requisitos de hardware para ejecutar el emulador varían según su configuración actual. A continuación, enumeramos los requisitos de hardware mínimos y recomendados. Para obtener la mejor experiencia, los usuarios deben ejecutar dentro de los requisitos recomendados. No podemos garantizar el rendimiento de las especificaciones del sistema por debajo de los requisitos recomendados, pero siempre puede experimentar.
Requisitos recomendados
Para ejecutar todos los títulos jugables a un rendimiento decente para ser jugados:
CPU AMD - 6 cores y 12 hilos, 8 cores o más Arquitectura AMD Zen 2 o más nueva AMD Threadripper 1000 y 2000 series no recomendades Intel - 6 cores y 12 hilos, 8 cores o más Arquitectuira Intel Skylake o más nueva GPU AMD - Compatible con Vulkan con soporte para driver activo Arquitectura AMD Polaris, RX 400 series o superior NVIDIA - Compatible con Vulkan con soporte para driver activo Arquitectura NVIDIA Maxwell, GTX 900 series o más nuevas RAM 8 GB de RAM dual-channel o más Memoria dual-channel es altamente recomendable por encima de la de un solo canal. Almacenamiento Almacenamiento SSD para los datos del emulador, y SSD o HDD para almacenar los juegos 512 MB para los datos base del emulador, 5GB para la cache virtual 128 MB para la caché del emulador y los datos de consola del usuario por juego instalado *Recomendación habitual. Algunos juegos quizás requieran más, otros menos. Sistema operativo Windows Windows 10 21H2 o más nuevo, Windows 11 21H2 o más nuevo Linux Linux 5.17 o más nuevo macOS macOS Monterey 12.0 o más nuevo FreeBSD FreeBSD 13.0 o más nuevo
Instalación de archivos de firmware de PlayStation 3
Por motivos legales, no podemos distribuir archivos de firmware oficiales de PlayStation 3. Debes descargar el último archivo de actualización del firmware de PlayStation 3 de PlayStation.com para utilizarlo con RPCS3. Una vez descargado, debes instalar el firmware utilizando el instalador de firmware integrado de RPCS3 que se encuentra en Archivo > Instalar firmware.
Por defecto, los módulos de firmware se cargan automáticamente en función del título de PlayStation 3 cargado. Puedes anular la carga automática de módulos y elegir manualmente los módulos de firmware que deseas utilizar. Esto no es recomendable.
Los usuarios de Windows pueden gestionar los archivos de datos guardados en \dev_hdd0\home\00000001\savedata\
Los usuarios de Linux pueden administrar los archivos de datos guardados en ~/.config/rpcs3/.
Gestión de títulos de PlayStation 3
Por motivos legales, los títulos de PlayStation 3 no pueden distribuirse en línea y deben descargarse desde tu propia consola PlayStation 3 o desde tu ordenador utilizando una unidad Blu-ray compatible.
Tanto los títulos Blu-ray como los de PlayStation Network (PSN) deben colocarse en una única carpeta con sus respectivos archivos y el nombre de la carpeta debe corresponderse con el ID del título. Si no estás seguro de cuál es el ID de región de tu título volcado, puedes encontrarlo en el borde lateral inferior de la caja del juego. Si ya no tienes la caja del juego o sólo puedes acceder al título a través de PSN, puedes buscar en Internet "Nombre del juego + ID de región". Ten en cuenta que es muy importante que utilices el ID de región correcto.
Distribución típica del directorio de un título en disco Blu-ray: Carpeta PS3_GAME, PS3_DISC.sfb, carpeta PS3_UPDATE (no necesaria)
Disposición típica del directorio de un título de PSN: Carpeta TROPDIR, carpeta USRDIR, ICON0.png, PARAM.sfo, etc.
PlayStation 3 title formats
Title IDs that start with a B are Blu-Ray disc titles.
Title IDs that start with a N are PSN titles.
When working with actual title region IDs, the title's region ID will look something similar to this:
Example: BLUS30443 is a US Blu-Ray disc copy of Demon's Souls.
Example: NPEB01393 is a EU PSN copy of Hatsune Miku: Project DIVA F.
Installing PlayStation 3 titles
.pkg files must be extracted using RPCS3's built-in package installer found under File > Install .pkg (or simply drag and drop .pkg to the main emulator window)
.pkg files will be automatically installed to \dev_hdd0\game\
Blu-ray disc title data can be placed in \dev_hdd0\disc\ or anywhere else except for \dev_hdd0\game\ and can be booted from File > Boot Game if not present on the game list.
PSN title data must be placed in \dev_hdd0\game\
PSN .rap files must be placed in \dev_hdd0\home\00000001\exdata\ (or simply drag and drop them to the main emulator window)
Note: If you're on Linux, RPCS3 folders are located in ~/.config/rpcs3/
Installing PlayStation 3 title updates
Title updates are handled the same as PSN .pkg files. The. pkg update file must be installed using RPCS3's built-in package installer found under File > Install .pkg
The update will be placed in the title folder that corresponds to the correct region ID. Please note that title updates must be the same region in order to work. Cross-mixing title regions may create irreversible damage to the title.
Software Distribution laws in your country
When dumping video game software, users are subject to country-specific software distribution laws. RPCS3 is not designed to enable illegal activity. We do not promote piracy nor do we allow it under any circumstances. Please take the time to review copyright and video game software dumping laws and/or policies for your country before proceeding.
By following these instructions, you will do so at your own discretion. Should you follow these instructions against your local law, we shall not be held responsible for your actions.
Dumping with a PlayStation 3
We recommend that you dump your own PlayStation 3 titles from your own console. This is the most compatible way to migrate your disc-based titles and the only way to dump digital titles to your PC. To do this, you will need a PlayStation 3 system with custom firmware.
For dumping disc-based games, you need to use multiMAN homebrew software in order to dump your disc files. You can transfer those files over to a computer through an external drive or using a FTP connection between your PlayStation 3 and your computer.
Note: The PlayStation 3 has a maximum file size of 4GB. When dumping games which contain files bigger than 4GB, multiMAN will split those files. When you have your dump over on your computer, you must rejoin the split files back together with part merging software such as ps3merge, otherwise the dump won't work.
For dumping digital games, you must copy the game folder from dev_hdd0/game/GameID on your console over to the same path on your RPCS3 folder. You also need to get your console's IDPS, the game's RIF and ACT.DAT, in order to generate a .RAP license file to be used in the emulator.
It is also possible to dump digital content and licenses on any PS3 even without custom firmware, by the way of creating a system backup, and then extracting it with ps3xport software.
Dumping with a Blu-ray drive
You can dump titles using your computer by using select compatible Blu-ray drives. Please note that you can only use this method if a .ird file is available online for the decryption of the disc. Not every Blu-ray drive will recognize PlayStation 3 titles due to how PlayStation 3 format discs are designed. Requirements for a Blu-Ray drive to be able to fully read PlayStation 3 discs are: Mediatek chipset and a +6 read offset.
Compatible Blu-ray disc drives
Here's a compiled list of the known compatible Blu-ray drives that are capable of reading PlayStation format discs for use with your computer.
LG Drives BE16NU50 (External) BH14NS40 BH16NS40 BH16NS48 BH16NS55 BH26NS40 BP50NB40 (External) BU20N BU40N CH12NS30 UH12NS30 WH12LS30 WH14NS40 WH16NS40 WH16NS48 WH24LS30 WH24NS40 WH26NS40 BH16NS60 ASUS Drives BC-08B1LT BC-12B1ST (Some revisions) BC-12D2HT BC-16D1HT BW-12B1ST BW-16D1HT Samsung Drives SH-B083L SH-B123L SE-506 SE-406 LITE-ON Drives DH-4O1S IHBS112 Sony Drives Optiarc 5300S PS3 BDD with proprietary adapter BenQ Drives BR1000 One-click easy solution
This is an automated & user-friendly way of getting a decrypted copy of your PlayStation 3 discs. You must possess one of the aforementioned compatible disc drives to complete the disc dumping procedure. Again, this method will not work with standard Blu-ray drives.
PS3 Disc Dumper by 13xforever
Insert a PlayStation 3 format disc title of your choice into your compatible Blu-ray drive. Run the PS3 Disc Dumper. Step-by-step disc dumping
In case the easy way didn't work for you, here's a compiled list of the step-by-step instructions we used for dumping disc-based PlayStation 3 titles.
PS3 ISO Patcher by BlackDaemon 3K3Y ISO Tools by 3K3Y ImgBurn How to:
Insert a PlayStation 3 format disc title of your choice into your compatible Blu-ray drive. Create the .iso image using an .iso dumping program of your choosing, e.g. ImgBurn or IsoBuster. Use jonnysp.bplaced.net to download the appropriate .ird file that matches your title ID. If there isn't an .ird file that matches your title ID, you cannot use this method to dump your selected PlayStation 3 disc at this time. Be sure to check the title ID in case there is a different edition of that title. e.g. Uncharted 2 Game of the Year Edition. You must use the correct .ird with the same title ID, otherwise it won't work. (Example: .ird file for Demon's Souls US disc doesn't work with Demon's Souls EU disc). Using PS3 ISO Patcher, select the matching .iso and .ird files, then press Patch to apply the decryption keys to the .iso file. Using 3K3Y IsoTools press Decrypt button and select the .iso with patched-in decryption keys. This will produce decrypted .dec.iso file. Optionally, validate that you have successfully obtained the correct copy of your game. You will need to install PS3 ISO Rebuilder tool from jonnysp.bplaced.net Load your .dec.iso file and your .ird file in the program and let it verify the dump. All of your files must be either Valid or Not required. In 3K3Y ISO Tools, use the Tools drop-down menu to select ISO > Extract ISO and then select the decrypted .iso file to extract its files. Another option is to use 7-zip or any other software that is capable of extracting .iso images. You are now able to use the extracted .iso files with RPCS3. by Nekotekina & kd-11.
-
Vita3K
Vita3K is an experimental PlayStation Vita emulator for Windows, Linux and macOS.
The emulator currently runs a few homebrew programs in .vpk format. No commercial games are playable.
-
EmuDeck
EmuDeck es una colección de scripts que te permite autoconfigurar tu Steam Deck, crea tu estructura de directorios de roms y descarga todos los emuladores necesarios para ti junto con las mejores configuraciones para cada uno de ellos.
EmuDeck funciona muy bien con Steam Rom Manager o con EmulationStation DE.
Usando Steam Rom Manager
Esta opción te da todos tus juegos presentados con sus artes de caja como si fueran un juego normal de Steam. EmuDeck tiene configuraciones precargadas para Steam Rom Manager.
Usando EmulationStation DE
EmuDeck configura EmulationStation DE para que utilice las mismas carpetas de roms que EmuDeck crea para ti e incluso descarga todos los emuladores y núcleos que ES-DE necesita, todas las configuraciones que EmuDeck instala se llevan a cabo cuando se utiliza EmulationStation DE.
EmuDeck ha sido creado por dragoonDorise.
-
Ryujinx
Ryujinx es un emulador experimental de Nintendo Switch para Windows, macOS y Linux escrito en C#.
Este emulador tiene como objetivo proporcionar una precisión y un rendimiento excelentes, una interfaz fácil de usar y compilaciones consistentes.
Créditos
gdkchan - Lead Developer Ac_K - Developer Thog - Developer riperiperi - Developer LDj3SNuD - Developer emmauss - Developer »jD« - Developer Xpl0itR - Developer Moosehunter - Developer Lordmau5 - Web Designer -
Yuzu
Yuzu es un emulador de código abierto de Nintendo Switch para Windows y Linux, de los creadores de Citra.
El emulador es capaz de mover la mayoría de juegos comerciales a toda velocidad.
Yuzu es un proyecto en el que participan una gran cantidad de desarrolladores, encabezados por bunnei.


-
Recientemente actualizado
-
Novedades populares