PS2
116 archivos
-
HD Advance
HD Advance is a cloned version of the HD Loader software for the PlayStation 2, which allow users to play games installed to the optional hard drive peripheral available for the PS2.
HD Advance is identical in functionality to many patched versions of HD Loader freely available online (that include DVD-9 support and 48-bit hard drive addressing) - only with a different theme and some changed text strings.
The only benefit of HD Advance is that it is distributed on a pressed disk, giving a patched version of HD Loader that can run on a console without a modchip installed, and also without the need of the PS2 Independence Exploit or any other software modification.
-
HD Loader
The HD Loader is an application (.ELF) for your PS2 that you can run off your memory Card, an USB Stick or a CD an then load your games off the Hard Drive that you can connect over the Network Adapter with you Fat PS2.
-
HD Project
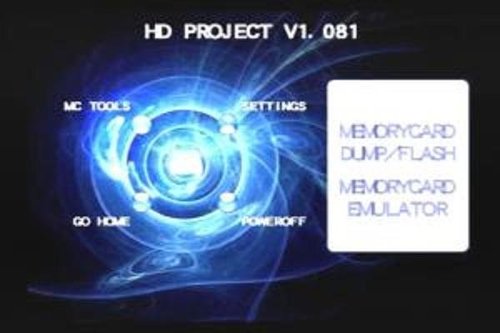
HD Project is a game loader allowing to emulate memorycards from HDD or USB.
-
HDL Batch Installer
HDL Batch Installer es una GUI para HDL_Dump.
Características principales de HDL Batch Installer:
Instala varios juegos a la vez Extrae varios juegos a la vez Asignar automáticamente el título del juego original antes de la instalación Inyecte MiniOPL en la partición del juego (para iniciar el juego desde HDD-OSD) Inyecte MBR.KELF en el disco duro Editar el título del juego Inyección masiva de KELF e íconos en cada juego instalado Aplicación creada por israpps.
-
HDL Dump Helper GUI
HDL DUMP HELPER GUI es una interfaz gráfica programada en Java, la cual ayuda al usuario a usar de forma sencilla el programa de línea de instrucciones Hdl_Dump.
Con HDL Dump Helper GUI puedes organizar tu disco duro de Ps2 con el programa de línea de instrucciones Hdl_Dump. Puedes instalar un juego desde una Imagen-ISO o desde una unidad CD/DVD-ROM en tu disco duro de Ps2 formateado con Hdloader a través de una conexión de red o con el disco duro conectado localmente (IDE/USB). Puedes ver una lista de los juegos que tienes instalados y editarlos. También puedes borrar y copiar un juego en tu pc.
Estas son las principales funciones. Para usar un disco duro en tu Ps2 necesitas un adaptador de red con un disco duro compatible. También necesitas poder usar el programa HDLoader en tu Ps2 (necesitas el disco del Hdloader o instalarlo mediante modchip, swap, etc.).
HDL Dump Helper GUI está programado en Java, de esa forma funciona en casi todos los SO (eje. muchas distribuciones Linux, Windows) excepto MAC OS, porque no hay Hdl_Dump incluido para MAC.
Lo único que necesitas es la última versión del Java Runtime Environment.
El programa es muy explicativo gracias a su herramienta de consejos.
Para iniciar la GUI en Windows puedes usar el archivo .exe o simplemente haz doble clic en el archivo .jar, el cual también funciona si el JRE está bien instalado.
Si en ambos casos no funciona ve a "Inicio" -> "Ejecutar" y escribe "cmd". Busca la carpeta que contiene la GUI usando la instrucción "cd".
Ahora escribe "java -jar hdldh_gui.jar" y la GUI se ejecutará.
Para iniciar la GUI en una distribución de Linux puedes hacer doble clic en el bash-script ./launcher-linux si se quiere ejecutar a través de "chmod +x <file>".
Si estás en la consola también puedes escribir ./launcher-linux o "java -jar hdldh_gui.jar".
Puedes crear también un acceso directo en el escritorio si quieres. He incluido un icono que puedes usar para ello en la carpeta "/files" llamado "desk_icon.png". Coge el bash script y el icono a la hora de crear el acceso directo para el escritorio.
Para más ayuda usa la "Ayuda" del programa.
También puedes acceder a ella abriendo con un navegador el archivo "help_es.html"
que se encuentra en la carpeta files/.
by Simon Schaal.
-
HDL_Dump & HDL_Dumb
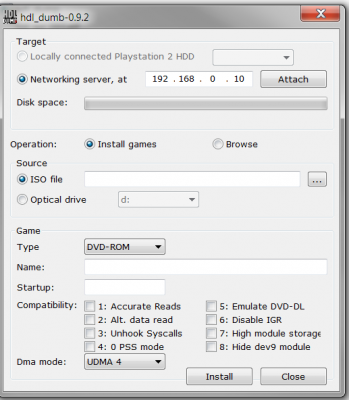
HDL DUMP / HDL DUMB are a set of tools to install Playstation 2 games, which are to be played using HD Loader or OPL.
TOC
---
Networking server Compilation Configuration and list file location Configuration New features Networking server
-----------------
A new, purely UDP networking server is available, based on recently released on
psx-scene forums smap driver --
http://ichiba.geocities.jp/ysai187/PS2/smap.htm
It is called hdl_svr_093.elf and is a part of hdl_dump sources.
You might need to punch a hole in your firewall for incoming UDP from port 12345.
Compilation
-----------
Firts of all you have to update your PS2SDK.
Next: you have to run shell script "diskload.sh" for getting latest mini-opl version.
Finally: You just can run shell script in the project folder: "mkrel.sh". It will
compile both gui and normal version for windows.
* Linux: Build and copy executable into a directory of your choice.
make RELEASE=yes
Advanced Linux build commands:
make XC=win # for Windows cross-compilation using mingw32
make -C gui # for WineLib compilation (for now doesn't work)
make -C gui XC=win # for GUI cross-compilation using mingw32
* FreeBSD and MacOS X: You'll need to have GNU make installed, then
gmake RELEASE=yes IIN_OPTICAL_MMAP=no
or
make RELEASE=yes IIN_OPTICAL_MMAP=no
* Windows: You need to have CYGWIN (http://www.cygwin.com/) installed;
then use
make RELEASE=yes
make -C gui RELEASE=yes
to compile command-line or GUI version.
You can use this guide for preparing sdk for windows:
http://psx-scene.com/forums/f150/compiling-windows-118947/#post1124987
Configuration and list file location
------------------------------------
You can place this files in folder where is installed hdl_dump for making it portable.
* Windows: (cited names are for English version of Windows)
C:\Documents and Settings\<login name>\Application Data\hdl_dump.conf
C:\Documents and Settings\<login name>\Application Data\hdl_dump.list
* Linux, FreeBSD and MacOS X: (~ is your home dir)
~/.hdl_dump.conf
~/.hdl_dump.list
Configuration
-------------
* disc_database_file -- full path to your disc compatibility database file;
New features
------------
All new stuffs can be used from HDD_OSD or BB Navigator or XMB from PSX DVR.
inject_dvd, inject_cd, install or copy_hdd.
WARNING: BUG: You need to specify dma mode or hdl_dump crashes (*u4, *m2)
You can place boot.elf (which is actually miniopl.elf) in the folder
where is launched from hdl_dump. It is optional you can skip this file.
You also can place list.ico (*.ico from memory card)
and icon.sys (*.sys from memory card).
Or you can write your own icon.sys file.
You can use both files or skip any of them.
If you skip *.ico will be used HDloader default icon.
If you skip *.sys will be used HDloader default icon settings.
This command will install game onto hard disk. Be careful if you choose
command copy_hdd - every HDL game will loose their icons and will use only
one for all.
boot.elf - you can use everything but I prefer miniopl. Miniopl allows you
to launch titles from HDD OSD or BB NAV by pressing on title.
boot.elf injection address - 0x111000
boot.elf size limit - 2 026 464 bytes (thanks to kHn)
--------------------------------------------------------------------------
initialize
When you use this command and place hard drive into your playstation 2 phat
and power it on - it will launch mbr. So it can be used as Free MC Boot
replacement (no need for memory card or modchip for lauching homebrews).
In previous version this command tried to install one __mbr partition - but
there was a bug in the code so this command won't work correctly. I decide to
remove it at all and replace with MBR injection. All that you need - place
MBR.KELF in the corresponding folder. All HDD data will remain intact!!!!!
MBR.KELF injection address - 0x404000 (for compatibility with BB Nav)
MBR.KELF doesn't have any restrictions by themself.
There is no easy way to make MBR.KELFS from common elf.
------------------------------------------------------------------------------
modify_header
Code:
hdl_dump.exe modify_header 192.168.0.10 PP.TEST
This command will inject header attributes in any already existing partition.
It can operate such files:
system.cnf
icon.sys
list.ico
del.ico
boot.kelf
boot.elf
boot.kirx
Any file can be skipped. Program first of all tries to inject boot.kelf.
If it is not found it will try to inject boot.elf.
Now icon.sys can be in any of 2 formats: Memory Card format or HDD format.
del.ico injection address: 0x041000
If del.ico is used list.ico maximum size 260 096bytes.
boot.elf (or boot.kelf) injection address - 0x111000
boot.elf size limit - 2 026 464 bytes (thanks to kHn)
boot.kelf size limit - 3 076 096 bytes (if boot.kirx not used)
boot.kelf size limit - 2 031 616 bytes (if boot.kirx is used)
boot.kirx injection address - 0x301000
boot.kirx size limit - 1 044 480 bytes
------------------------------------------------------------------------------------
If you want to know more about these files (and their restrictions) you have to
study official ps2sdk document called
hdd_rule_3.0.2.pdf
There is also some undocumented features like this:
- If you want to inject boot.kelf (or boot.elf) you have to change BOOT2 in system.cnf
Code:
|-----------------|
| BOOT2 = PATINFO |
|-----------------|
This is used for HDL games for example.
If you need to erase boot.elf from PATINFO you have to place zero-sized boot.kelf or elf
in program folder.
-If you want to launch KELF from PFS partition you have to change BOOT2 in system.cnf
Code:
|---------------------------|
| BOOT2 = pfs:/EXECUTE.KELF |
|---------------------------|
where EXECUTE.KELF - is path to KELF which is placed into partition. Can be changed.
-If you want to inject kirx into partition you have to add a line into system.cnf
Code:
|-----------------|
| IOPRP = PATINFO |
|-----------------|
Don't ask me about kirx - I don't know where it can be used.
-If you don't want to boot from HDD OSD you have to add such a line into system.cnf
|----------------|
| BOOT2 = NOBOOT |
|----------------|
Happy gaming.
$Id: README,v 2.0 2015-12-12 20:13:14 AKuHAK Exp $
-
HDL_Dump GUI
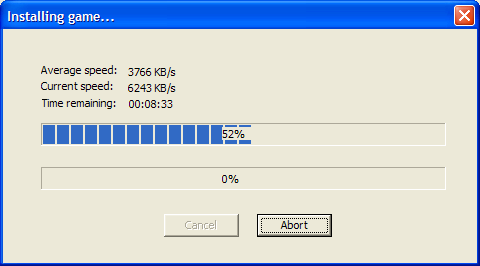
HDL_Dump GUI is a graphical program, which helps to install PS2 games from a PC onto the PS2. Its based on the command line program hdl_dump and includes mostly all its functions in an easier way.
With it you can install PS2 games over LAN or on a locally connected PS2 HDD through IDE or USB. It also can list and edit the installed games from the HDD which is stored in your PS2. You also can copy the games back from the PS2 HDD onto your PC.
This app maybe a bit obsolete.
If you're having problem with launching this app, try Compatibility Mode: Windows XP SP3.
by vtecorona.
-
HDLBATCH
HDLBATCH is intended as a batch game installer for the Playstation 2 HDD using HDL_DUMP as the main mechanism for transferring games. It supports CUE/BIN files for CD games, and ISO files for DVD games (including dual- layered DVDs, aka DVD9). CDs may also be in ISO format (e.g. converted to be compatible with OPL Manager), or even a mix of both CUE/BIN and ISO formats.
Game titles can either be specified by a gameid.txt file formatted as:
SCPS_510.01 Moto GP 2 SCPS_510.04 Bravo Music SCPS_510.05 Samurai SCPS_510.06 Alpine Racer 3 SCPS_510.08 Wave Rally SCPS_510.09 Underwater Unit SCPS_510.10 Shikigami no Shiro and a copy has been provided with this release. Please note that some titles, however, have far more characters than will fit on the OPL game menu, making some discs titles more difficult to distinguish. Examples such as "Xenosaga Episode III - Also Sprach Zarathustra [Disc 1]" and "Xenosaga Episode III - Also Sprach Zarathustra [Disc 2]" suggest that these two discs would appear identical on the OPL menu if only a fixed number of characters are displayed. For those games, it is recommended that the titles be adjusted. Perhaps:
Xenosaga Ep. III (D1) - Also Sprach Zarathustra
would suffice to keep titles distinct even if OPL menu shortens them. The gameid.txt file does not need to be sorted, but if multiple entries exist for a game, it will use the first found entry. The gameid.txt file provided herein is sorted by region code and numerical ID for organizational convenience, and is based off of the master list at PS2 OPL CFG.
NOTE: If your game title needs to include an exclamation mark (!) make sure that all exclamation marks are preceeded with a caret (^) symbol.
For example:
SLUS_209.45 Destroy All Humans^!
is the entry for the game "Destroy All Humans!" (this is required to work around a quirk with batch files and delayed expansion).
The batch file is setup up to always do a test run first! The test run simply displays the game type (CD vs DVD), game ID, and title. All users should use a test run to check that their games will install correctly. There are several things to look out for:
Every game MUST have a valid game ID. If HDLBATCH cannot find a valid game ID, then chances are, your game file is corrupt. Verify that the SHA-1 or MD5 checksums match those found on redump.org Make sure that you are happy with HDLBATCH's game titles for your game. After you are satisfied with the output of the test run, edit the single option called TEST to enable the actual installation.
PLEASE TAKE ALL PRECAUTIONS THAT YOU SELECT THE CORRECT DRIVE TARGET!
For network installations, run hdl_svr_093.elf on the PS2, and then select option 4 (network). Enter in the IP of the PS2 when prompted. Note that network installations will most certainly depend on your network connection. For large installations, a network installation is NOT recommended (250 games totaling ~625GB takes about 1 hour 45 minutes to install when attaching the PS2 HDD to the motherboard).
Lastly, because HDLBATCH calls HDL_DUMP, which scans your hardware for PS2 HDDs, you must run with administrator rights. Right click on the batch file, and select "Run as Administrator" and follow the prompts.
(You may also want to disable your computer's power management so that your computer does not put itself to sleep in the middle of an install!)
Speeds:
PS2 HDD attached to PC motherboard via SATA 100MB/s - 150MB/s PS2 HDD via USB3 adapter (varies by adapter) ~70MB/s PS2 HDD via ethernet ~5MB/s
F.A.Q.
1. Why HDLBATCH when HDL_HDD_Batcher and HDL Dump Helper GUI already exist?
a) HDL_HDD_Batcher requires CDs and DVDs in two separate directories, and CDs must be in ISO format. CUE/BIN is more appropriate for CD rips. Dual-layered (DVD9) games are installed incorrectly 100% of the time.
b) HDL Dump Helper GUI requires Java. On modern hardware and newer versions of Windows, the EXE file fails to find a runtime environment even if one is installed, although users may open the .jar file manually. Batch installing is also tedious; each file must be added to the job list. Also, HDHG uses HDL_DUMP 0.9.0, which seems to be much slower at writing to drives attached via USB.
HLDBATCH uses a newer version of HDL_DUMP which is faster for USB-attached drives, and handles all CD and DVD games (including dual-layered ones) in one directory. You just run the batch file, answer a few questions, and walk away until all games are installed.
2. What about WINHIIP?
WINHIIP fails to install many games properly. It has a hardcoded limit of 255 games (which can be bypassed by tediously renaming existing game partitions). It does not support 2TB drives. And if users should ever run its "repair" feature, games whose titles share the same first <x> characters will have collision (i.e. later partitions will overwrite previous partitions; this is often an issue with multi-disc games or games within a series that have long series names).
3. HDLBATCH said one of my games was not a CD/DVD even though OPL loads and plays it fine by USB/SMB. I can even view the ISO or CUE/BIN file on my PC. Should I be concerned?
Chances are, your game file is corrupt. This might mean absolutely nothing if, say, dummy filler files do not match the official files. It is best, though, to re-rip your game and verify the checksum against those found on sites like redump.org and be safe rather than sorry should
your game eventually crash.
4. My games directory is huge! Is there any way to save the test run output into a text file?
Yes. The test run will prompt you whether you wish to use gameid.txt and the only valid answers are Y or N (must be
capital letters). Any other response will cause a beep. After all the info is displayed, the screen will pause
until you press ENTER. With that in mind, you can run HDLBATCH in a command prompt with admin rights as follows:
HDLBATCH > info.txt
and this will cause all output to be placed into the file named info.txt -- but this will also capture the prompt at the beginning and the pause at the end! So you will have to answer the question "blind" and then hit ENTER after you see the info.txt file in your file explorer window with a size greater than 0.
-
HDLGameInstaller
The HDLGameInstaller program allows the user to install the PlayStation 2 games on the hard drive installed in the PS2, for a direct start with HDDOSD.
Features:
- Install all PlayStation 2 games from the CD / DVD drive. - Install all PlayStation 2 games remotely from a PC, over a network. - Installed games can be started directly from the HDDOSD. - Allows the user to manage games locally on the PlayStation 2 console. - Allows the user to manage games remotely from a PC, over a network. - Network performance uses the latest PS2SDK Ethernet modules, with speeds of approximately 2.8 MB / s. - Allows the user to specify the saved icon to use with the game. - Support for games> 4 GB and DVD-DL. -
HDLGameInstaller (HDLoader Game Installer Tool)
The HDLoader game installer allows the user to install PlayStation 2 games onto the installed Harddisk Drive, for direct booting with the HDDOSD (Browser v2.00 update).
It can also be used as an alternative to HDLDump, as this software does not use the HDLDump protocol and hence entirely uses TCP for data transfer. This means that unlike HDLDump, it's more reliable.
It has the following features:
Installs all PlayStation 2 games from the CD/DVD drive. Installs all PlayStation 2 games remotely from a PC, over a network. Installed games can be booted directly from the HDDOSD. Allows the user to manage games locally on the PlayStation 2 console itself. Allows the user to manage games remotely from a PC, over a network. Network performance uses the latest ethernet modules from the PS2SDK, giving about 4MB/s. Allows the user to specify the savedata icon to use with the game. Supports games >4GB and DVD-DL games. Game list can be sorted alphabetically (controlled from the PlayStation 2). Supports the Dynamic Host Configuration Protocol (DHCP), for easy set up. Setting Storage
Settings are now saved into the HDLGameInstaller save data folder:
hdd0:__common/Your Saves/HDLGAMEINSTALLER
If you wish to delete the save, you may do so with the HDD Browser or compatible homebrew (e.g. LaunchELF).
Notes on network support
HDLGameInstaller now maintains its own network configuration file on the HDD unit. If you have not configured HDLGameInstaller before, your existing homebrew network settings will be automatically imported from IPCONFIG.DAT. Network settings can now be configured from the Options menu. Please ensure that TCP ports 45061 and 45062 are allowed in your network. If you use the Windows Firewall, you may have to allow "public" access for HDLGManClient.exe. Pad support worsens performance. However, it is possible to connect to the PS2 at any time, even when the options screen is displayed. If this is done, then the software will not disable pad input until the options menu is closed. For best performance, keep the options menu closed. Supported Devices
HDLGameInstaller may be installed (copied) onto and can be booted from:
USB Mass Storage Devices. Only USB disks are supported. Multi-function devices are not supported. The disk must have only one partition. Otherwise, the first partition will be accessed. PlayStation 2 HDD Unit. Other devices are not supported.
Known limitations/bugs
The icon preview does not totally right. I don't have the knowledge nor resources to commit towards fixing it up. Someone else will have to solve this, sorry. The UI isn't the nicest one, but it works. No Japanese input support on the PS2 installer's end. DVD9 games are supported from the PC client only, as the CDVDMAN module within the boot ROMs of all consoles does not support DVD9 layer 1. Not compatible with the APAEXT partitioning scheme (i.e. ToxicOS). !!!Do not use this software with a disk formatted with APAEXT, or data loss will occur!!! As the variable-width font may result in an uneven number of characters being displayed on the screen as a line is scrolled, the user may observe that the cursor might jump back by one place while scrolling. This is not a bug. -
HDLGameUpdater (HDLoader Game Updater)
The HDLoader Game Updater automatically updates the bootstrap program of all your HDLoader games (the program which makes these games bootable from the HDD OSD/browser update v2.00, aka Mini OPL or Diskload).
This software will not automatically make games which are not already bootable, bootable.
This current version is meant to be used for updating your games to have the same bootstrap program as the one installed by HDLGameInstaller v0.809.
How to setup this software:
Extract all files (do not delete any files, especially the DejaVu font!), and place all of them in the same place. The only supported devices are the Memory Card, CD/DVD drive and USB mass storage device. Credits:
This software may have been worked on mainly by me, but I had the support of other users: l_Oliveira, for providing a number of test reports and giving suggestions for its design. JNABK, since I'm still using the icons he provided me with for use in PS2ESDL. "Someone who wishes to remain anonymous" Jimmikaelkael, for open-ps2-loader (OPL). OPL is used for making the installed games bootable. All closed-beta testers! -
HWC OSDSYS Launcher
This will launch a OSDSYS from your MC.
If you have a PS2 with v2.30 BIOS or higher, you can use this application as DEV1 (mc0:/BOOT/BOOT.ELF) as well as a FORTUNA default ELF (mc0:/FORTUNA/BOOT.ELF) replacment and use it to launch the FMCB hacked OSDSYS or XEB/XEB+.
Detailed instructions for FMCB installation on SCPH-900XX or PSTV:
FMCB v1.8C (with modchip):
1 - Take a clean FMCB 1.8C release and decompress it
2 - Select the correct HWC's OSDSYS Launcher "BOOT.ELF" for your region IF REQUIERED (* read notes)
3 - Go to the INSTALL folder and paste "BOOT.ELF" in it
4 - Create a folder called "APPS" inside the "INSTALL" folder
5 - Paste you beloved apps in there (OPL, uLE, etc)
6 - Copy the installation files to a pendrive and put it on your PS2
7 - Use the method you want to launch the FMCB installer (a uLE DVD it's perfect if you have no MC with DEV1 ready)
8 - Select normal install and wait
9 - Once done, reset your PS2 and configure your modchip to boot from DEV1
10 - Now reset your PS2 again, when the FMCB logo shows up, press SELECT to configure FMCB.
FMCB v1.9 (with modchip):
1 - Take a clean FMCB 1.9 release and decompress it
2 - Delete the "BOOT.ELF" inside the "BOOT" folder
3 - Select the correct HWC's OSDSYS Launcher "BOOT.ELF" for your region IF REQUIERED (* read notes)
4 - Go to the "BOOT" folder inside the "INSTALL" folder and paste the HWC's OSDSYS Launcher "BOOT.ELF" in it
5 - Go to the "APPS" folder inside the "INSTALL" folder and paste you beloved apps in there (OPL, uLE, etc)
6 - Copy the installation files to a pendrive and put it on your PS2
7 - Use the method you want to launch the FMCB installer (a uLE DVD it's perfect if you have no MC with DEV1 ready)
8 - Select normal install and wait
9 - Once done, reset your PS2 and configure your modchip to boot from DEV1
10 - Now reset your PS2 again, when the FMCB logo shows up, press SELECT to configure FMCB.
FORTUNA Users (no modchip required):
1 - Install FMCB (you do not need to fellow the instructions above, you can use a noobie package if you want to).
2 - Select the correct HWC's OSDSYS Launcher "BOOT.ELF" for your region IF REQUIERED (* read notes)
3 - Replace the BOOT.ELF in the FORTUNA's folder (mc0:/FORTUNA/BOOT.ELF) with the HWC's OSDSYS Launcher's "BOOT.ELF"
4 - Now reset your PS2 again and go to the browser and launch the FOTUNA exploit as always
5 - When the FMCB logo shows up, press SELECT to configure FMCB.
Diferences with FORTUNA FMCB Launcher by VTSTech:
Well, it seems that VTSTech did NOT tested his application on real hardware. His application will NOT work properly
on consoles with v2.30+ BIOS. Of course, it will work as intended on any console with v2.20 or lower, but that's not
the main reason to use this application, right?
Notes:
We made an "small" adjustment on the software logic to avoid a certain issue: people having a messy FMCB installation on their memory card AND users using a launcher from "certain developer" who does not knows how to reset IOP properly.
It seems that there's someone on eBay selling FMCB memory cards with a "multi-region" installed FMCB v1.8C which includes three different FMCBs installations made from three different consoles. That setup is a nonsense as the KELFs are not really region free, these are ELFs injected on the DVDELFs from XXX01, XXX04 and XXX06. That seller does not seems to know that FMCB v1.9 exists and can do proper multi-region installations.
If you do not have these kind of frankenfmcb, ANY ELF in our release should work for you, but, if that's not the case, please, select the proper one for your region.
--------------------------------------------
Howling Wolf & Chelsea
2017-2020
Made In Cuba!
--------------------------------------------
I you have any questions you can contact
me on psx-place.com as "HWNJ" or send me
an email to cerebro404hwc@gmail.com or
howlingwolfandchelsea@gmail.com
--------------------------------------------
-
iLaunchELF
Launch ELF Files on the PS2 From Http.
Features:
Http Based ELF loader Demo For the PS2 Uses DHCP For Network Config Loads an ELF file into Memory Via HTTP and Boots it!. Tested and Working on Real Hardware
Notice
This Program Was Built with The PS2DEV SDK and has utilized sample code from it. This Program Utilizes the HTTP Client File System from the PS2DEV sdk The ELF Loading Portion of the Code is From the w/uLE project. Warranty
This Application Has No Warranty. The Creators of this app cannot be held Responsible for any damage Created by krHACKen & Based_Skid.
-
ISO to OPL
USBUTIL replacement for formatting PS2 ISOs for OPL.
Extract this to C:WindowsSystem32 and run this from the command line. Works with all PS2 ISOs, even ones larger than 4 GBs.
-
Kelftool
An open-source utility for decrypt, encrypt and sign PS2 KELF and PSX KELF files.
You need to bring your own keys.
Place them at your home directory (%USERPROFILE%) in "PS2KEYS.dat" file as a 'KEY=HEX_VALUE' pair.
SHA256 Hashes of the keys:
THESE ARE HASHES, NOT THE ACTUAL KEYS
MG_SIG_MASTER_KEY=e6e41172c069b752b9e88d31c70606c580b1c15ee782abd83cf34117bfc47c91 MG_SIG_HASH_KEY=0dc3a1e225d3e701cfd07c2b25e7a3cc661ded10870218f1f22f936ba350bef5 MG_KBIT_MASTER_KEY=1512f3f196d6edb723e3c2f4258f6a937c4efd6441785b02d7c9ea7c817ad8fa MG_KBIT_IV=14dfe8dbec477884c5eefceb215fa3910e33f4d371ddc125a16ac5ebc9c63a80 MG_KC_MASTER_KEY=7858c04eb5029d3e7e703ef46829279bfeaf30cb33bc13f54b7f78f0940905c1 MG_KC_IV=2fa98f860a4562ecb9aff64a79aaeff7c82099c83ca1e61320a9b05f50ca9170 MG_ROOTSIG_MASTER_KEY=27393c06331f5de238ea62a016f5b4428b11bd2c78d9f0e4bba3bc242a9a1bba MG_ROOTSIG_HASH_KEY=5023ea32da5f595d15edf3aad08941dd96ae42a1ad32690a8ca35a024d758bd2 MG_CONTENT_TABLE_IV=3d9ac39d6e1b69b076da20a38593b2f4ccdd5f943b991c99eacbea13cb1cf0a4 MG_CONTENT_IV=4e3f5dfaf24c8016c60a23ced78af1e469522dbedb65ca7c8abfb990458f036b by xfwcfw.
-
Lazy MD5 Checker
Un simple archivo por lotes que permite analizar tus juegos de PS2 para obtener el checksum MD5, comparándolo automáticamente con redump.org para determinar si la imagen de disco fue manipulada.
El propósito principal de este archivo es poder checkear si estás teniendo el error de pantalla blanca al ejecutar un juego en Open PS2 Loader (OPL) por culpa de que el juego fue manipulado.
Otras funciones
se creará un archivo .log que contendrá fecha, hora, ubicación y el resultado del análisis de cada archivo que fue analizado (por defecto estará en %appdata% Puedes personalizar esta ruta by israpps.
-
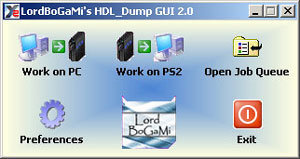
LordBoGaMi's HDL_Dump GUI
CHANGELOG:
HDL_Dump GUI 2.1
----------------
* Add CD/DVD Support in JobQueue
* Add Chinese Language
* Add Simple Chinese Language
* Add French Language
* Add Alternative HDL_Dump Server (README is buttom)
Transfer speed is up to 40% faster
DISABLE compression if you use this Server !!
- Fix error with 100% CPU Usage (thanks to wizard of oz)
- Fix some errors in JobQueue
- Fix some errors in PS2 Mode Window
HDL_Dump GUI 2.0
----------------
* HDL_Dump 0.8.2 support
* Add Support for 8 Modes
* Add Shutdown Computer on end
* Change Font
* Add JobQueue
* Add Spanish Language (thanks Nemesis1978)
* Add Italian Language (thanks sincro)
- Fix error on changing CD/DVD during Transfer crash
- Fix error on Startup
- ONLY FOR Windows 2k and Windows XP - NO Windows 9x Support
HDL_Dump GUI RC2
-----------------
* Add Full Multilanguage support
* Add PowerOff after Job
- Fix Shortcut delete on deinstall
- Fix Shutcut Execute Path
- Fix Tranfer Status on PC-ISO 2 PS2 Transfer
- Fix sort by Compatibility flags
- Fix display Language Files in Config
HDL_Dump GUI RC1a
-----------------
- Fix Font Installation
- Fix About Button
HDL_Dump GUI RC1 (first Release)
--------------------------------
* ToxicOS support (no APAEXT)
* HDL_Dump 0.8.1 support
* HDL_Dump 0.8.1 Server in Install Directory
* Windows 9x support
* format your Harddisk
* Compatibility Flags (Mode 1 - 6)
* DVD9 support (thanks to crazyc)
* Multilanguage support (over xxx.HDL file) not full
* editable Startup File
* print Imagelist
* Copy from PS2 Device to PS2 Device
* Create ISO from CD/DVD
* Transfer Images from PC to PS2
* Transfer CD/DVD from PC to PS2 (not DVD9)
* Transfer Images from PS2 to PC
* Delete Images on PS2
* Full LAN Support
* Full local Support
COMING SOON:
* Game Compatibility Database
* Burn ISO direct from GUI
Thanks to wizard of oz for hdl_dump
Thanks to nemesiz.tk for LordBoGaMi's Tools Forum
Thanks to Zer0-X, weltall, crazyc and all other for new HDL features
Thanks to http://www.ps2-scene.org
Thanks to http://www.ps2hd.com
eMail: lordbogami@nemesiz.tk
----------------------------------------------------------
Original from w1zard0f07
Alternative hdld_svr.elf README
===============================
What's all this about?
----------------------
Alternative hdl_dump networking server uses lwip's RAW API, instead of sequential one (AKA BSD-sockets). The benefit is 40% better network throughput - 1,15MB/sec compared to the old one of 0,8MB/sec (measured when client is running on the Linux box); the drawback is somewhat more complex server, because lwip RAW API requires a state machine operation. Also, stock ps2ip.irx doesn't export lwip RAW API, therefore server is integrated into the ps2ip.irx itself.
Another drawback is lack of decompression code, which means, that client SHOULD NOT use compression (turn it off in the config file).
by LordBoGaMi.
-
MechaPwn
Cualquier problema abierto que no sea un problema real, sino una pregunta, será cerrado.
Descargo de responsabilidad: NO UTILICE A EN UN DTL/DEX REAL; Esto establece la bandera QA que fuerza el uso del keystore de retail, esto rompería la compatibilidad de la tarjeta de memoria.
Las banderas DEX reales (no QA) no se han añadido a la versión pública de mechapwn por su propia seguridad.
Los autores no se responsabilizan si rompes/dañas tu consola Playstation 2 usando este software.
Esta herramienta se puede utilizar para cambiar de región y configuración de las consolas mechacon base Dragon.
Esto significa que las consolas Playstation 2 desde los sistemas SCPH-5000X hasta los SCPH-90000X son compatibles (con la excepción de las consolas DESR (PSX) que no son compatibles en este momento, una futura actualización está prevista para resolver esto)
Las unidades más antiguas de Playstation 2 NO utilizan un mechacon basado en Dragon y por lo tanto no son compatibles, no se planea soporte para ellas en el futuro.
¿Cómo utilizar MechaPwn?
Asegúrese de que si está usando FMCB tiene instalada la v1.966 "multi install". Ejecute Mechapwn una vez para instalar el parche/payload del exploit, se hará una copia de seguridad inicial de su eeprom de mechacon en el dispositivo de almacenamiento masivo usb (¡manténgalo a salvo!), luego apague la consola desconectándola de la red eléctrica cuando se le pida (mechacon está encendida incluso cuando la cpu de la ps2 está apagada, así que realmente necesita desconectar el cable de alimentación). Vuelve a ejecutar Mechapwn para elegir la región que quieres. Elige si quieres usar el desbloqueo forzado o restaurar el conjunto de parches original (y desinstalar el parche del exploit) desde tu copia de seguridad de mechacon. Tendrás que volver a instalar el parche de explotación para cambiar tu región de nuevo
Explicaciones de las opciones del menú:
CEX (Retail) sólo establecerá la bandera de región y el ID de máquina de su elección (no se aconseja mezclar y combinar diferentes tipos de ID de máquina, por ejemplo, establecer un ID SCPH-75001 a una consola SCPH-50004.
Retail-DEX (Debug) le permitirá establecer una configuración/región QA Flagged DEX con un ID de máquina DEX de su elección, esto permite a mechacon leer discos de todas las regiones así como masterdiscs (la opción retail no lo hace).
¿Cómo funciona?
Los MechaCon basados en Dragon (SCPH-500xx y más recientes) almacenan banderas de configuración y parches encriptados en su eeprom, la clave DES del parche fue eventualmente forzada lo que permitió la ejecución de código en esas unidades y que el almacén de claves completo fuera volcado.
Normalmente el área de parches está protegida contra escritura y no puede ser escrita en tiempo de ejecución, excepto cuando se utiliza el PMAP en modo TEST (esto requiere soldadura), además el área de configuración sólo puede ser escrita cuando está vacía.
Esto se hace para evitar que un atacante o cualquier persona ajena a la propia fábrica de Sony pueda sobreescribir la configuración del mechacon.
Sin embargo, se ha encontrado un fallo explotable en la función writeconfig que permite escribir datos arbitrarios en el área de configuración,
esto permite escribir un parche de mechacon que deshabilita la protección de escritura en los bits de configuración de mechacon y así establecer regiones y banderas específicas en mechacon.
Esto permite lo siguiente:
En SCPH-500xx y SCPH-700xx: Desactivar la comprobación de la región del disco (los discos ps1 y ps2 de todas las regiones así como los masterdisc montan con datos accesibles) Cambiar la región que reporta la consola, así como cambiar la región del disco/kelf que permite mechacon BOOT discos PS2 originales de las regiones NTSC-J y NTSC-U directamente desde el OSD (sólo unidades NTSC-J) BOOT discos originales PS2 todas las regiones directamente desde el OSD (NTSC-U y ASIA (no NTSC-J) unidades solamente) Arrancar discos originales de PS2 de todas las regiones, así como Masterdiscs de PS2 de todas las regiones, omitiendo la comprobación del logotipo (por ejemplo, cargando un disco con ulaunchelf) Consolas NTSC-J y PAL: Cargar discos originales de PS1 de la región original de la consola Consolas NTSC-U y ASIA (no NTSC-J): BOOT de discos originales PS1 de todas las regiones En los modelos SCPH-7500X y posteriores (también conocidos como consolas Deckard) Desactivar las comprobaciones de región de los discos (los discos ps1 y ps2 de todas las regiones, así como los masterdisc, se montan con datos accesibles) Cambiar la región de la ROM IOP (la ROM establece un banco específico de acuerdo con las banderas de región de mechacon) Cambiar la región que la consola reporta como, así como cambiar la región del disco/kelf que mechacon permite BOOT discos originales PS2 todas las regiones directamente desde el OSD Arrancar discos originales de PS2 de todas las regiones así como Masterdiscs de PS2 de todas las regiones saltando la comprobación del logo (por ejemplo cargando un disco con ulaunchelf) Arrancar discos originales de PS1 de todas las regiones FAQ:
¿Por qué las consolas PAL/NTSC-J no reproducen discos NTSC/PAL (en scph-70000 y anteriores)?
La ROM IOP de esas consolas ha aplicado estrictas comprobaciones de descifrado de logotipos tanto en la BIOS de la PS1 como en la de la PS2, que la BIOS de la NTSC-U (también utilizada en las consolas ASIA) no tiene.
¿Por qué las consolas no ejecutan los masterdiscs directamente desde el OSD?
Existe una protección adicional en el DSP, que es diferente en las consolas retail y debug, la debug permite a mechacon almacenar la clave xor del masterdisc en sus registros, la retail no. Saltarse la comprobación del logo salta esta protección (esto se puede hacer usando ule o un futuro parche cdvdman usando un homebrew de ps2)
Mi PS2 tiene un modchip. ¿Me funcionará?
No lo sabemos. Esto depende del modchip que estés usando, se ha reportado que algunas revisiones del chip modbo 4.0 no se deshabilitan realmente cuando se "deshabilitan" causando conflictos/problemas de compatibilidad con los cambios de región de mechapwn, mientras que hemos visto que funciona con un modbo 5.0 con deshabilitación que sí funciona como se pretende (con todas las características del modchip aún funcionando cuando se habilita en la consola convertida).
¿Por qué mi PS2 ya no reproduce DVDs / FreeDVDBoot ha dejado de funcionar?
El KELF del reproductor de DVD dentro de la BootROM (BIOS) está bloqueado por región en las consolas no deckard (pre SCPH-750XX). Desde que cambiaste la región de la consola no puede ejecutar ese archivo. Para arreglar eso necesitas instalar una actualización del DVD Player en tu tarjeta de memoria.
¿Por qué FreeMCBoot dejó de funcionar?
La versión 1.8 es un reproductor de DVD KELF y tiene el mismo problema que los reproductores de DVD.
La versión 1.9 es soportada, pero tienes que asegurarte que tienes la versión multi-región ("multi install") instalada.
Aplicación creada por MechaResearch.
-
Memory Card Annihilator
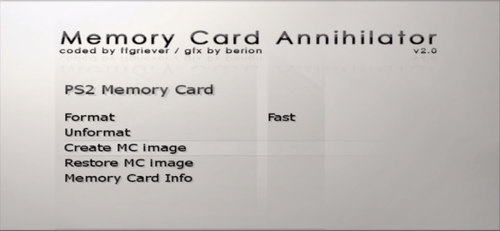
Memory Card Annihilator es una herramienta creada en 2007. Su objetivo principal es formatear / desformatear tarjetas de memoria (tanto PS2 como PSX), así como gestionar imágenes de tarjetas de memoria (crear imágenes de tarjetas físicas y escribir imágenes en tarjetas físicas). Se puede utilizar para restaurar tarjetas rotas por otros formateadores a la normalidad (por ejemplo, cuando MCKiller y herramientas similares han formateado una tarjeta de 64 MB a 8 MB).
Tiene un manejo de bloques bastante bueno, por lo que incluso las tarjetas gastadas deberían funcionar bien después del formateo (a menos que sea el primer bloque que se atornilló, debido a la forma en que mcman maneja las tarjetas al reconocer el sistema de archivos, no creo que este tipo de El error podría resolverse de una manera diferente a la reasignación de bloques de hardware).
La versión anterior, aunque funcionó muy bien (obtuvo bastantes historias de éxito), tenía dos grandes inconvenientes:
a) estaba todo en polaco, b) el modo de visualización se fijó en PAL. Ahora, en 2010, creé mi propio "Marco GUI". Es bastante genérico, por lo que probablemente podría usarse en cualquier plataforma, pero creé renderizadores dedicados, sistemas de entrada, administradores de texturas, sistemas io para PC Windows (renderizado usando OpenGL) y PS2. Finalmente me aburrí de las pruebas unitarias (bueno ... para algunos sistemas las pruebas "unitarias" ni siquiera eran posibles, él, él). Así que, junto con Berion, decidimos volver a lanzar MCAnnihilator modificado. Utiliza el nuevo marco para hacer toda la GUI. La parte principal es prácticamente la misma que la de 2007 (solo se han realizado algunas correcciones).
Por lo tanto, ahora admite varios idiomas, se puede mostrar en PAL / NTSC / VGA. No hace un uso completo del marco (solo algunas ventanas simples, efectos, impresión de texto, entrada, etc.), pero fue una gran prueba de "vida real" para él. Pude encontrar muchos errores (especialmente en PS2 Vram Manager). También he notado que el fwork necesitaba algunas cosas adicionales. Sin embargo, aunque es solo una prueba, es una aplicación completa.
2. Basic usage.
The video mode needed should be detected automatically (for PAL/NTSC - depending on console). But if it fails for some reason, you can always force particular mode by keeping a button pressed during application startup. The options are as follows:
a) PAL - press dpad RIGHT.
b) NTSC - press dpad LEFT.
c) VGA (640x480) - press dpad UP.
All the gfx has been made with PAL (640x512 framebuffer) mode in mind, so for NTSC (640x448 framebuffer) and VGA (640x480 framebuffer), everything is downscaled to match the screen and preserve on-screen aspect ratio (not the framebuffer pixel ratio). This makes the app to look a little bit worse in NTSC and VGA. One possibility would be to move the screen up and not scale it. But that caused top and bottom to be cut off... And the on-screen aspect ratio would change (so everything would look like it was stretched vertically up).
The possibility to exit application and launch another elf (browsing) has been added just before the release... Take it as an experimental feature. It should work fine, though.
The keys are pretty straightforward. Some are not that obvious, but whenever needed, a hint is displayed to make sure the user knows what to do.
- dpad up/down: change menu item selection, change file selection in explorer.
- dpad left/right: change horizontal menu item selection (yes/no), change submenu item selection (fast/full formatting), change memory card size in the size selection window to the nearest of 8/16/32/64/128MB.
- L1/R1: change memory card size in the size selection window by the unit of 1MB, jump to the next/previous page in file explorer.
- L2/R2: enable/disable file mask in file explorer (on by default).
- START: display virtual keyboard in file explorer, display "thanks/about" window.
- SELECT: when in main menu (card selection screen), display "exit to" dialog and browser to select elf file to exit to, display memory card info screen when in memory card screen (there is also an additional menu item that does exact same thing).
- X: confirm.
- TRIANGLE: cancel/return.
I decided to put the key mapping for virtual keyboard in separate paragraph to make things easier for everyone. You can open the virtual keyboard when using file explorer in write mode by pressing START button.
- left analog stick: move cursor.
- dpad: move cursor (you can switch analog mode on/off by using
"mode" button).
- X: "press" the highlighted key.
- SQUARE: space (can also be pressed on screen).
- CIRCLE: backspace (can also be pressed on screen).
- R1: shift (active only when button is pressed, can also be pressed on screen).
- L1: caps lock on/off (can also be pressed on screen).
- START: enter (confirms filename, exits keyboard, can also be pressed on screen).
- TRIANGLE: exit keyboard without selecting filename.
3. Menu items description.
FORMAT
It basically does what it says. The iop code will clear all the card blocks, check the card for bad blocks (multiple times to make sure) and save bad blocks in an array, then it will write the new filesystem. There are two options: "Fast" and "Full". Fast should be ok for most cases. Full makes additional bad block checks and writes all the card pages (necessary in some cases... takes few times as long as fast). Fast is the default (you can just leave it... unless you're experiencing some problems).
UNFORMAT
Clears all blocks. It leaves the card in a state it should be when you bought it (totally clear, no filesystem on card). Then
you can use PS2 Browser, in-game tools or whatever you like to format it.
CREATE MC IMAGE
Creates an image of memory card (or a portion of it) and stores it in a selected place. Creates a raw memory card image (without ECC after every page, so you can mount it in uLE or use it with mcsio emulator or OPL). Stores MCI descriptor file for PS2 memory cards.
RESTORE MC IMAGE
Restores an image of memory card (writes the selected image to the physicall memory card). Only raw memory card images are supported - no ECC block after every page (no worries, MCA will calculate ECC on the fly if needed). If the image is shorter than the card capacity, an error will be displayed (all the image data will be written, though). IMPORTANT NOTICE: MCA WILL NOT CHECK FOR BAD BLOCKS WHEN RESTORING THE IMAGE. THAT WOULD REQUIRE TO CHANGE THE IMAGE DATA, WCHICH IS UNACCEPTABLE (it's fine only if you're trying to store standard MC filesystem data... which is most likely the only thing you will do, but for the sake of versatility, it has to be left this way.)!
MEMORY CARD INFO
Displays some basic information regarding the card in currently selected slot. There is a "shortcut" to this option - just press "SELECT" button.
5. Disclaimer.
This application is free and provided "as is", without warranty of any kind, either expressed or implied. The authors cannot be held responsible for any damage to the hardware or data loss caused by application usage and missusage.
~ ffgriever & berion 09.09.2010
-
MemoryCard Killer (MCKiller)
MC Killer is a quick utility to format your memory card.
Essential for recovering lost space or fixing a corrupt cards file system.
Requires the ability to run 'homebrew' software to work.
Note: This app only supports 8 MB memory card located in 1st slot. Do not try it with other size.
-
MIPS Mini Assembler
MIPS Mini Assembler is a single instruction assembler for the MIPS (PS2 Emotion Engine) architecture.
How to use it
Enter a line of assembly code into the upper text box and press the Enter key or click 'Assemble' to assemble an instruction.
Output will appear in the lower text box and is automatically copied to the clipboard.
The input format is the same as that used by ps2dis.
Note: Constants are written as hexadecimal preceded by '$' with the exception of shift instructions (no '$' is required).
Instructions are output in their hexadecimal representation (Big Endian format).
The 'Mask' button is used to create search patterns usable with ELF Search Tool.
This can aid in finding all instances of a given instruction within a program.
Input only the instruction name and click 'Mask' to generate a search pattern:
Note: Elf Search Tool must be set to 'Big Endian' mode.
Instruction definitions are stored in the included plaintext file mips.conf which must be in the same directory as mini_mips_asm.exe.
mips.conf defines the following 73 standard instructions: sll, srl, sra, sllv, srlv, srav, jr, jalr, syscall, break, mfhi, mthi, mflo, mtlo, mult, multu, div, divu, add, addu, sub, subu, and, or, xor, nor, slt, sltu, bltz, bgez, bltzal, bgezal, beq, bne, blez, bgtz, addi, addiu, slti, sltiu, andi, ori, xori, lui, lb, lh, lw, lbu, lhu, sb, sh, sw, lwc1, swc1, ld, sd, j, jal, add.s, cvt.s.w, cvt.w.s, div.s, neg.s, mfc1, mov.s, mtc1, mul.s, sub.s, c.eq.s, c.lt.s, c.le.s, bc1t, bc1f 2 Emotion Engine specific instructions: lq, sq As well as 7 mnemonic instructions: bal, b, move, li, nop, not, clear -
MyMC
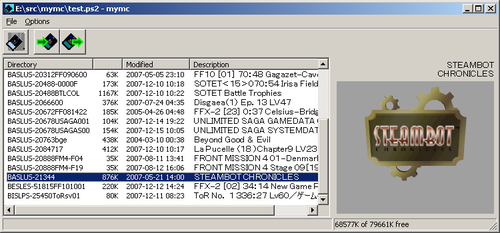
This file describes mymc, a utility for manipulating PlayStation 2 memory card images as used by the emulator PCSX2. Its main purpose is to allow save games to be imported and exported to and from these images. Both MAX Drive and EMS (.psu) save files are fully supported, however save files in the SharkPort/X-Port and Code Breaker formats can only be imported and not exported. In addition to these basic functions, mymc can also perform a number of other operations, like creating new memory card images, viewing their contents, and adding and extracting individual files.
A simple, hopefully easy to use, graphicial user interface (GUI) is provided, but it's limitted to only basic operations. More advanced opterations require the use of a command line tool. To install mymc, unpack the downloaded ZIP archive to a new directory on your machine.
You can then run the GUI version of mymc by openning that newn directory with Windows Explorer and double clicking on the "mymc-gui" icon. To make it easier to access, you can drag the "mymc-gui" icon to either your Desktop, Start Menu or Quick Launch toolbar. Make sure if you do so, that you create a shortcut to "mymc-gui.exe". If you copy the file instead, the program won't work.
The command line utility can be invoked from the Windows Command Prompt by using the "mymc" command. The executable "mymc.exe" and
number of support files and these file must kept together in the same directory. To run the command you need to either add the directory where you unpacked the distribution to your PATH or type the full pathname of the executable. For example if you unpacked mymc to a directory named "c:\mymc" you need to enter "c:\mymc\mymc.exe" to run the program.
The second important thing to note is that mymc is only "alpha" quality software. This means that has is been released without extensive testing and may be unreliable. While it works fine for me, the author, it might not work as well for you. For that reason you should be careful how you use it, and prepared for the eventuality of it corrupting your save game images or producing garbage save files.
If you're worried about this, one make things safer is to use two memory card images. Use the first image to load and save your games ith under PCSX2, and the second image to import and export saves games using mysc. Then use the PS2 browser to copy files between two card images.
GUI TUTORIAL
============
The GUI for mymc is should be easy to use. After starting mymc, you can select the PS2 memory card image you want to work with by selecting the "Open" command by pressing the first button on the toolbar. You can then import a save file clicking on the Import toolbar button. To export a save files, first select it and then press the Export button. You can delete a save file permanently from your memory card, by selecting the "Delete" command from the File menu.
Do not try to use mymc to modify a memory card image while PCSX2 is running. Doing so will corrupt your memory card.
COMMAND LINE TUTORIAL
=====================
The basic usage template for mysc is "mymc memcard.ps2 command". The first argument, "memcard.ps2" is the filename of the memory card image while "command" is the name of the command you wish to use on the image. So for example, assuming you've installed mymc in "c:\mymc" and you've installed PCSX2 in "c:\pcsx2" you could enter the following command to see the contents of the memory card in the emulator's slot
1:
c:\mymc\mymc c:\pcsx2\memcards\Mcd001.ps2 dir
You would see output something like this:
BASLUS-20678USAGAS00 UNLIMITED SAGA
154KB Not Protected SYSTEMDATA
BADATA-SYSTEM Your System
5KB Not Protected Configuration
BASLUS-20488-0000D SOTET<13>060:08
173KB Not Protected Arias
7,800 KB Free
This is the simple "user friendly" way to view the contents of a memory card. It displays the same information you can see using the PlayStation 2 memory card browser. On the right is name of each save, and on the left is the size and protection status of the save. Also on the left is one bit of information you won't see in the browser, the directory name of the save file. PlayStation 2 saves are actually a collection of different files all stored in a single directory on the memory card. This is important information, because you need to know it to export save files.
As mentioned above, if you know the directory name of a save, you can export it. Exporting a save creates a save file in either the EMS (.psu) or MAX Drive (.max) format. You can then transfer the save to real PS2 memory using the appropriate tools. You can also send the saves to someone else to use or just keep them on your hard drive as a backup. The following command demonstrates how to export a save in the EMS format using mymc:
c:\mymc\mymc c:\pcsx2\memcards\Mcd001.ps2 export BASLUS-20448-0000D
This will create a file called "BASLUS-20448-0000D.psu" in the current directory. To create a file in the MAX format instead, use the export command's -m option:
c:\mymc\mymc c:\pcsx2\memcards\Mcd001.ps2 export -m BASLUS-20448-0000D
This creates a file named "BASLUS-20448-0000D.max". Note the "-m" option that appears after the "export" command.
Importing save files is similar. The save file type is auto-detected, so you don't need use an "-m" option with MAX Drive saves. Here's a couple of examples using each format:
c:\mymc\mymc c:\pcsx2\memcards\Mcd001.ps2 import BASLUS-20035.psu
c:\mymc\mymc c:\pcsx2\memcards\Mcd001.ps2 import 20062_3583_GTA3.max
ADVANCED NOTES
==============
- To get general help with the command line utility use the "-h" global option (eg. "mymc -h"). To get help with a specific command use the "-h" option with that command (eg. "mymc x import -h"). In this later case, you need to specify a memory card image file, but it's ignored and so doesn't need to exist.
- Both executables in the Windows version, "mymc.exe" and "mymc-gui.exe" do the same thing and support the same options. The difference is that "mymc" is console application, while "mymc-gui" is a Windows appliction. Currently, using "mymc" to start the GUI will result in a fair amount debug messages being printed that are normally not seen "mymc-gui" is used.
- It's possible to use mymc create images that are bigger (or smaller) than standard PS2 memory cards. Be very careful if you do this, not all games may be compatible with such images.
- The bad block list on images is ignored. Since memory card images created with either PCSX2 or mymc won't have any bad blocks, this shouldn't be a problem unless you've somehow extracted a complete image from a real memory card and expect to copy it back.
- The PS2 only uses at most 8,000 KB of a memory card, but there is actually 8,135 KB of allocatable space on a standard error-free memory card. The extra 135 KB is reserved so that memory card with bad blocks don't appear to have less space than memory cards with fewer or no bad blocks. Since there are no bad blocks on memory card images, mymc uses the full capacity provided by standard memory cards.
PYTHON SOURCE DISTRIBUTION
==========================
The "source code" distribution of mymc is provided for users of Linux and other non-Windows operating systems. It uses the same Python code that the Windows distribution is built with (using py2exe) and supports all the same functionality. One big difference is that the Windows DLL "mymcsup.dll" is not included and as a result compressing and decompressing MAX Drive saves will be as much as 100 times slower.
The GUI mode is hasn't been extensively tested on non-Windows systems, and the 3D display of save file icons requires the DLL. The Python source version should support big-endian machines, but this hasn't been tested.
by Ross Ridge.
-
myPS2
myPS2 is an application with that you can browse your file, view images, hear music on your ps2 with a nice GUI.
-
Omniconvert
Omniconvert, like its predecessor, MAXConvert, can encrypt and decrypt codes for many devices. As of this release (2008) it handles codes for all commercially available devices available in North America, and most (if not all) devices available in Europe and Asia. More than that is designed to perform the more common translations of codes from one device to another. It is also capable of creating update files for the three modern devices.
This help file will describe the primary features, and assist you in using the program.
This program's appearance is an amalgam of MAXConvert and CB2Crypt. I had always wanted to clean up the interface of MAXConvert by moving many of its options to menus, but people were somewhat accustomed to the way MAXConvert was, through it and virtually every other tool. When CB2Crypt used this sort of organization without getting many public complaints, it seemed like Misfire had paved the way. Hopefully, I won't regret following down it...
Features of Omniconvert
Supported Encryptions and Devices
Omniconvert can encrypt and decrypt codes for any major commercial device currently on the market. The only encryptions it does not handle are those that may be used by lesser known devices that are generally knock-offs of one of the better known devices. Typically, you can make codes compatible with those devices by either using unencrypted codes, or by encrypting the codes for one of the devices named in Omniconvert's menus. The encryptions listed in the menu are:
Action Replay MAX Action Replay Version 1 Action Replay Version 2 CodeBreaker Version 1 and Up CodeBreaker Version 7 and Up Gameshark Version 1 Gameshark Version 2 Gameshark Version 3 and Up Xploder Version 1 and Up Xploder Version 4 and Up Additionally menu items are present for Xploder Version 5+, and GameShark Version 5+. Those devices use the same encryption as their immediate predecessor (GameShark Versions 3-4 and Xploder Version 4), but they add a line to each code as a verifier. The extra option is there to force creation of this verifier when necessary. It is known to be optional on some versions that can utilize it. Therefore you may choose the lower version, if you wish to forgo the additonal line.
Code Translation
Omniconvert will attempt to translate codes between devices. It handles the common translations that can occur, and a few of the more complex, rarer translations. Due to compatibility issues between devices, 100% translation is not possible, and some of the most complex translations are impossible to handle automatically. Error text will replace the code output if a cheat contains codes that cannot be translated to the target device.
File Outputs
Omniconvert can save youre data to several formats. Action Replay MAX Code Lists (.bin) files. CodeBreaker Cheat (.cbc) files. Xploder/GameShark/Xterminator Update (.p2m) files. Plain text files. Contributors to Omniconvert
Source Code
Pyriel: The maintainer of this program. Interface, cheat file serialization, GameShark/Xploder/Xterminator crypt and utility routines. Misfire: CodeBreaker crypt routines, from CB2Util and CB2Crypt, and Action Replay Version 2 crypt routines. Parasyte: Action Replay MAX encryption. Much thanks is due to Misfire and Parasyte for the hard work that went into their respective works, and for releasing them under open source rules. Testing and Other Assistance
Bfoos ChaosZage Hacc Lee4 Skiller Toto67 -
Open PS2 Loader (OPL)
Open PS2 Loader (OPL) es un cargador de juegos y aplicaciones para Playstation 2 y Playstation 3, de código abierto.
Ahora soporta imágenes .ISO desde el HDD, compartir a través de Ethernet SMB y USB mientras mantiene la compatibilidad con los formatos de USB Advance y USB Extreme.
Actualmente es el cargador homebrew más compatible y puede funcionar sin ps2load o cambiar los DNASXXX.IMG.
Cómo usar Open PS2 Loader (OPL)
Open PS2 Loader utiliza la misma estructura de arbol de directorios a través de los modos HDD, SMB y USB:
--- "CD" (for games on CD media - i.e. blue-bottom discs) --- "DVD (for DVD5 images; DVD9 images on USB must be split) --- "VMC" (for 8MB Virtual Memory Card images) --- "CFG" (for saving per-game configuation files) --- "ART" (for box and disc art images) --- "THM" (for themes support) ---
USB
---
Los archivos de juegos en USB deben desfragmentarse perfectamente, ya sea archivo por archivo o por unidad completa, y las imágenes de DVD9 de doble capa deben dividirse para evitar las limitaciones de 4 GB del sistema de archivos FAT32. Recomendamos Power Defragmenter para obtener los mejores resultados de desfragmentación, y nuestra propia herramienta de línea de comandos iso2usbld para convertir o dividir juegos en formato USB Advance/Extreme ...
Otras utilidades son: USBUtil 2.0, USB Extreme installer or USB Insane.
---
SMB
---
Para cargar juegos mediante el protocolo SMB es necesario compartir una carpeta (por ejemplo: PS2SMB) en el equipo host o dispositivo NAS y asegurarse de que tiene permisos completos de lectura y escritura. El formato USB Advance/Extreme es opcional - las imágenes *.ISO son compatibles utilizando la estructura de carpetas anterior con la ventaja añadida de que las imágenes DVD9 no tienen que dividirse si tu dispositivo SMB utiliza el sistema de archivos NTFS o EXT3/4.
----
HDD
----
Para PS2, se admiten discos duros internos LBA de 48 bits de hasta 1 TB. Hay que formatearlos con WINHIIP o uLaunch. A partir de ahí, utiliza uLaunch para crear una partición (rec. mín. de 2GB) llamada "OPL". Si OPL detecta esta partición en el arranque, creará automáticamente la estructura de directorios anterior. Úsala para migrar ART, THEMES, CFGs, VMCs, etc. de tu MC o memoria USB al disco duro interno y liberar espacio en esos dispositivos.
Para iniciar OPL, puedes utilizar cualquiera de los métodos existentes para cargar un elf ejecutable.
En PS3, necesitas un disco SwapMagic 3.6+ o 3.8 original (de momento no hay otras opciones). Los pasos para cargar OPL en una PS3 son:
Cambia el nombre de OPNPS2LD.ELF a SMBOOT0.ELF Crea una carpeta en la raíz del dispositivo USB llamada SWAPMAGIC y copia SMBOOT0.ELF en ella. Ejecuta SwapMagic en PS3 y pulsa UP+L1 y se iniciará Open PS2 Loader. Hay 4 formas de lanzar elfs en SwapMagic:
SMBOOT0.ELF = UP + L1 SMBOOT1.ELF = UP + L2 SMBOOT2.ELF = UP + R1 SMBOOT3.ELF = UP + R2





.thumb.png.82b95f1a8b0f7e804fd16aa7dfad23b8.png)
